

Posted by Editorial Team on Oct 17, 2026
How to Install New Wheel Covers: Step-by-Step Guide
Table of Contents
- Before You Install: Safety and Preparation
- How to Measure Wheel Size for Hubcaps
- Checking Wheel and Rim Compatibility
- How to Remove Wheel Covers Safely
- Positioning and Aligning the New Wheel Cover
- Wheel Cover Retaining Ring Installation
- Pressing the Cover Into Place Evenly
- How to Keep Hubcaps From Falling Off
- Post-Installation Inspection and Driving Checks
- Frequently Asked Questions
Last Updated: October 17, 2026
Before You Install: Safety and Preparation
Learning how to install new wheel covers starts with a safe, level workspace. A wheel cover, also called a hubcap, is a plastic or metal disc that snaps onto the steel wheel to protect the lug nuts and improve appearance. At WheelCovers.Com, we've helped drivers replace lost covers for nearly 50 years, and the same rule holds: preparation prevents damage.
Start with these steps:
- Park on flat ground, away from traffic
- Set the parking brake and chock the opposite wheel
- Let the wheel cool if you just drove
- Gather a screwdriver, a trim tool, and a soft cloth
- Check that the new cover matches your wheel diameter
Never pry on a hot wheel or work in a travel lane. A loose cover that pops free at speed can strike another vehicle, so treat every install as a safety task first.
How to Measure Wheel Size for Hubcaps
Wheel size for hubcaps is the rim diameter in inches, measured straight across the wheel opening. You do not measure the tire. Look for a stamp on the sidewall, such as 16x6.5, where 16 is the rim diameter.
Here is how to measure wheel size for hubcaps when no stamp is visible:
- Lay a tape measure across the wheel opening
- Measure from inner lip to inner lip, straight across the center
- Read the number in inches
- Round to the nearest common size, such as 15, 16, or 17
Most covers list their size on the back in raised letters. If the number is worn off, check the vehicle's door jamb sticker or the owner's manual. Getting this number right is the single biggest factor in a secure fit.
Checking Wheel and Rim Compatibility
Fitment is where most installs go wrong, and it is the one step you can finish before you spend a dollar. A cover can match the diameter and still fail if the rim style or retention system differs. Steel wheels and alloy wheels hold covers in different ways, and many covers are built for one type only.
Identify your wheel type first
Look at the wheel with the old cover off. A steel wheel is a single stamped piece, usually painted black or silver, with a visible rolled lip around the outer edge. An alloy wheel is cast or forged, often with spokes and a machined face, and its outer lip may be too thick or too rounded for a snap-on cover to grip. Most snap-on covers are designed for steel wheels; alloy wheels more often use bolt-on or clip-on designs, and some alloy wheels accept no cover at all.
Know the three retention systems
- Snap-on ring: a spring-steel ring pre-mounted to the back of the cover grips the wheel lip. This is the most common design on steel wheels. The cover snaps on with hand pressure and pops off with a trim tool.
- Clip-on: individual plastic or metal clips around the cover edge grip the wheel lip. Clips are common on aftermarket covers and on some original equipment designs. A broken clip means a loose cover, so inspect each one.
- Bolt-on: the cover is held by the lug nuts or by small bolts threaded into the wheel. Bolt-on covers require you to loosen and retorque the lug nuts, so follow the vehicle manufacturer's torque specification and tightening sequence.
Run the fitment check before you buy
- Confirm the rim diameter matches the cover size in inches.
- Match the retention type to your wheel: snap-on ring for a steel lip, clip-on where clips are specified, bolt-on where lug-nut retention is designed in.
- Confirm the valve stem lines up with the cover's opening.
- Check that the cover clears the wheel weights; a weight sitting where a clip needs to seat will hold the cover off the lip.
- Verify the cover seats flush against the wheel lip with no gap.
A common mistake is forcing a cover that is close but not exact. If it needs real effort to start, it is the wrong cover. Return it and order the correct fitment rather than bending clips to make it work.
How to Remove Wheel Covers Safely
Removing an existing hubcap is the reverse of installing one, and it takes patience. Slip a flat screwdriver or trim tool behind the cover edge at the notch. Work around the rim in small steps, prying a little at each point.
Follow this order:
- Find the alignment notch or a gap in the cover edge
- Insert the tool and twist gently to loosen
- Move a few inches and repeat
- Pull the cover free once two or three points release
- Set the old cover aside and inspect the rim
Never yank a cover off in one motion. Steel wheels bend, and plastic retaining clips snap. If a cover is stuck, a plastic trim tool spreads force better than a metal screwdriver and lowers the risk of scratching the rim.
Positioning and Aligning the New Wheel Cover
Alignment decides whether the cover seats or fights you. Set the cover against the wheel with the valve stem opening lined up first. Most covers have a small notch or cutout that must sit over the valve stem.
Position the cover so it sits square to the wheel. Then check these points:
- The valve stem shows through its opening
- The alignment notch faces the correct clock position
- The cover edge rests evenly around the rim
- No clips or rings are trapped underneath
Rotate the cover slightly until it drops into place with light pressure. If it will not sit flat, stop and recheck the alignment. Forcing a misaligned cover is how plastic clips break.
Wheel Cover Retaining Ring Installation
Retention is the step that keeps the cover on at highway speed, and it looks different depending on the design. Snap-on covers use a spring-steel ring, clip-on covers use individual clips, and bolt-on covers use the lug nuts. Treat each one on its own terms rather than assuming every cover installs the same way.
Snap-on ring covers
The retaining ring, often made of spring steel, grips the wheel lip and holds the cover tight. On ring-style covers the ring is usually pre-mounted to the back of the cover. To install or reseat a ring:
- Lay the cover face down on a soft surface.
- Seat the ring into its groove around the cover edge.
- Work around the circle, pressing the ring in evenly.
- Confirm the ring sits fully in the groove with no high spots.
A ring that is partly out of its groove will let the cover work loose. If a ring is bent or rusted, replace it rather than bending it back. A fresh ring can prevent a repeat failure.
Clip-on covers
Clip-on covers rely on several individual clips around the edge. Before installing, inspect each clip for cracks, missing teeth, or bends. A clip that has lost its spring will not hold, and one weak clip is enough to let the cover walk off. If a clip is damaged, replace the cover or the clip set rather than forcing the cover on. When seating a clip-on cover, press near each clip in turn so every clip engages the lip.
Bolt-on covers
Bolt-on covers are held by the lug nuts or by small bolts. Thread the nuts or bolts by hand first to avoid cross-threading, then tighten in a star pattern to the manufacturer's torque specification. Recheck torque after a short drive; bolt-on covers that are under-torqued can loosen and shift.
Troubleshooting a cover that will not stay on
If a cover keeps coming loose, work through these causes in order:
- Wrong size or retention type: remeasure the rim and confirm the cover is built for your wheel style.
- Worn or bent ring: replace the ring rather than reshaping it.
- Broken or weak clips: replace the clip set or the cover.
- Trapped wheel weight or debris: clear the lip so the cover can seat flush.
- Cracked cover edge: a crack at the lip will not hold; replace the cover.
Pressing the Cover Into Place Evenly
Even pressure is the whole game. Once the cover is aligned and the ring is seated, press it onto the wheel with both hands. Work around the edge in a star pattern, pushing a little at each point until the cover snaps into place.
You should feel and hear a firm click at each clip. Keep your palms flat and push near the outer edge, not the center. Pushing the center can flex the plastic and crack it.
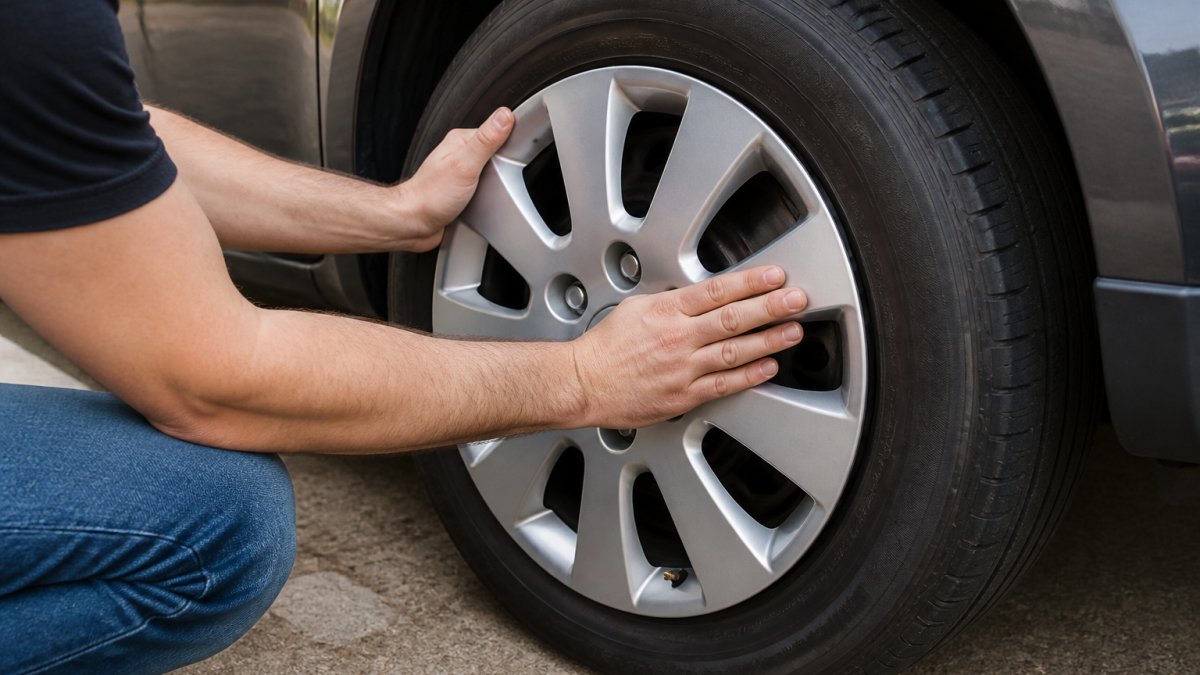
Check the fit by running a hand around the cover edge. It should sit flush with no gaps and no wobble. If one side lifts, press that area again before moving on.
How to Keep Hubcaps From Falling Off
Keeping hubcaps from falling off comes down to fit, retention, and routine checks. A cover that fits correctly and has an intact ring rarely comes loose. Most losses trace back to a worn ring, a cracked clip, or a cover that was never fully seated.
Use these habits:
- Confirm the cover is fully seated after every install
- Check the retaining ring for rust or bends
- Re-tighten or replace zip-tied covers before they fray
- Avoid curb scrapes that crack the plastic edge
- Recheck covers after tire rotations or wheel service
If you keep losing the same cover, the fitment is likely wrong. Measure again and match the retention type. A properly sized replacement cover solves the problem that a loose one keeps causing.
Post-Installation Inspection and Driving Checks
A short inspection now saves a roadside stop later. After the cover is on, walk around the vehicle and check each wheel. Then take a slow drive around the block and listen.
Run this final check:
- All covers sit flush with even gaps
- The valve stem is accessible on each wheel
- No cover wobbles when pushed by hand
- No rattles or clicks at low speed
- Covers stay put after a short drive
Recheck the covers after the first few miles. If anything shifts, reseat it before driving at highway speed. For replacements that fit right the first time, browse the WheelCovers.Com inventory of original and custom covers, and order online with nationwide shipping.
Frequently Asked Questions
Do you need to remove the wheel to install a wheel cover?
No, you do not need to remove the wheel to install new wheel covers. The entire process can be done with the wheel mounted on the vehicle. Park on a flat surface, engage the parking brake, and work one wheel at a time. Removing the wheel is only necessary if you are replacing the tire or servicing the rim itself. For standard hubcap and wheel cover installation, keeping the wheel on the car is faster and safer.
What should you do if a wheel cover will not snap into place?
If a wheel cover will not snap into place, stop and check three things. First, confirm the cover diameter matches your rim diameter; a mismatched size will never seat correctly. Second, inspect the retaining ring and plastic clips for bends or cracks. Third, verify the alignment notch lines up with the valve stem. Forcing a cover that will not seat can crack the plastic or damage the rim edge. If the fit is still wrong after these checks, the cover is likely the incorrect size or style for your wheel.
How can you tell if a wheel cover is the right size?
Measure your rim diameter across the flat inner edge where the tire bead sits, not across the outer lip. Wheel covers are sized to match that rim diameter in inches. A correctly sized cover sits flush against the wheel opening with no gaps and snaps securely over the retaining clips. If the cover rocks, sits proud of the rim, or leaves visible gaps around the edge, it is the wrong size. Always verify fitment against your vehicle's year, make, and model before ordering.
How do you get hubcaps to stay on?
Hubcaps stay on when the retaining ring and clips are in good condition and the cover is fully seated. Press the cover on evenly around the edge until you feel it snap over the clips. Check that the valve stem passes cleanly through its opening. Avoid potholes and curb contact, which are the most common causes of lost hubcaps. If a cover keeps coming loose, inspect the spring steel ring for bends and replace any cracked plastic clips before reinstalling.
Replacing a lost or damaged cover shouldn't mean hunting through salvage yards. At WheelCovers.Com, we stock over 1 million hubcaps, wheel covers, wheel skins, and trim rings, backed by nearly 50 years of family-owned experience and easy online ordering. Find your exact fit and get back on the road with confidence. Shop now at WheelCovers.Com.