

Oct 07, 2026
Wheel Cover Installation Without Tools: Step-by-Step
Table of Contents
- Wheel Cover Installation Without Tools: What Actually Works
- Prep the Wheel: Cleaning, Safety, and Knowing Your Wheel Type
- Step-by-Step: Snapping a Wheel Cover On by Hand
- Hubcap Installation Tips for a Tight, Rattle-Free Fit
- Stubborn Covers: Retention Ring and Cold Weather Fixes
- How to Remove Hubcaps Without Tools (So You Can Reinstall Them)
- Where to Buy Factory Replacement Hubcaps That Fit the First Time
- Conclusion: Fitment Beats Force Every Time
- Frequently Asked Questions
Last Updated: October 7, 2026
Wheel Cover Installation Without Tools: What Actually Works
Wheel cover installation without tools is realistic for most plastic hubcaps, and the whole job usually takes under five minutes per wheel. According to AutoZone's wheel cover guide, standard consumer wheel covers are designed to press onto the wheel by hand, with a gentle mallet tap as the only backup. At WheelCovers.Com, we've spent nearly 50 years helping drivers match covers to wheels, and the pattern is clear: fitment matters far more than force.
Here's the catch most guides skip. Tool-free installation only works when the cover matches your wheel's diameter and clip style. Get that wrong and no amount of pressing will help.
Below, we'll show you exactly how to prep the wheel, seat the cover, and fix the stubborn ones. We'll also cover cold weather, removal, and how to buy covers that fit the first time.
When Hand-Only Installation Is Realistic (and When It Isn't)
Hand installation works best on steel wheels with plastic retention clips. These covers are built to flex slightly and snap over the rim. Most drivers never need a tool.
It stops being realistic in three cases:
- The cover is a rigid aftermarket design with metal tension tabs
- The wheel is an alloy with a different mounting system
- The cover is warped or the clips are cracked
One note from the world of racing: World of Outlaws wheel cover rules now require three bolts on sprint car covers at certain tracks. That's a competition rule, not a street rule, but it shows how much installation methods vary by product.
If your cover won't seat by hand after two honest attempts, stop. Forcing it bends the retention ring.
Prep the Wheel: Cleaning, Safety, and Knowing Your Wheel Type
Clean the wheel first. Dirt and brake dust add friction and stop the cover from seating flat.
Here's the short version:
- Park on level ground and set the parking brake
- Let the wheel cool if you've been driving
- Wash the rim with soap and water, then dry it
- Check for bent rim edges or missing clips
Safety matters more than speed. Never work in traffic lanes, and never put your hands behind the tire where a rolling car could trap them.
Spot the Difference: Steel Wheels vs. Alloys and Clip Styles
Steel wheels are the easy case. They have a flat outer lip that plastic covers grip.
Alloy wheels are different. Many use a center cap instead of a full cover, and the mounting points sit closer to the hub.
Look at the back of your cover to identify the clip style:
- Plastic clips: flex and snap over the rim lip
- Metal tension tabs: grip harder and resist hand pressure
- Press-fit rings: rely on friction around the full circumference
Match the clip style to the wheel before you buy. This is where most fitment problems start.
Step-by-Step: Snapping a Wheel Cover On by Hand
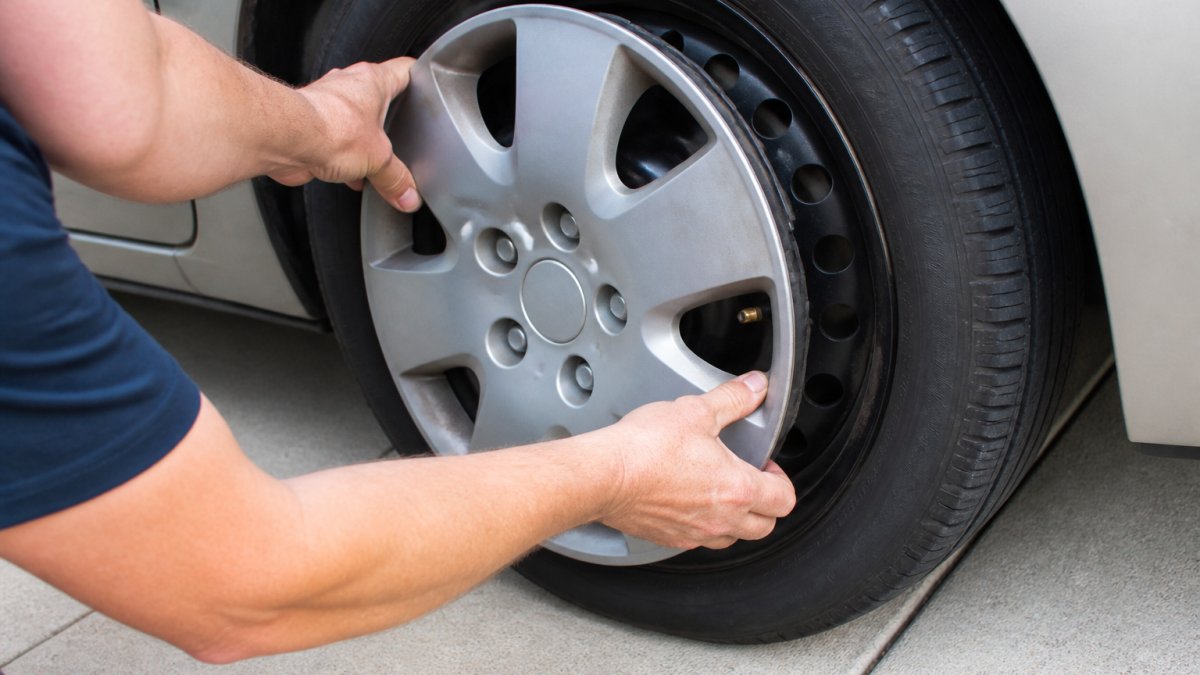
Line up the valve stem cutout with the valve stem first. Everything else follows from that alignment.
Total time: about 5 minutes per wheel Difficulty: beginner
Here are the steps:
- Rotate the cover so the valve stem notch sits over the valve stem
- Press the top edge of the cover against the rim lip
- Work your way around, pressing with both palms
- Push inward at the bottom to seat the final section
- Step back and check the gap all the way around
Press with the heel of your hand, not your fingers. You get more even pressure and less risk of bending a clip.
Step 5: Confirm the Cover Is Fully Seated
Walk the full circumference with your hand. Every clip should feel tight against the rim.
Then check two things:
- The gap between cover and rim is even all the way around
- The cover doesn't rock when you push the edge
A cover that rocks will rattle at speed. Pull it off and reseat it rather than driving on it.
Hubcap Installation Tips for a Tight, Rattle-Free Fit
A rattle almost always means one clip isn't engaged. Find it before it works itself loose.
Try these hubcap installation tips:
- Add a thin bead of rubber-safe lubricant to the rim lip for easier seating
- Tap the outer edge lightly with a rubber mallet if a section won't snap
- Spin the wheel by hand and listen for contact
- Recheck torque on lug nuts if you removed the wheel
Lubrication cuts friction, which lets the clips slide into place instead of fighting you. Use it sparingly. Too much and the cover can shift.
Stubborn Covers: Retention Ring and Cold Weather Fixes
Cold weather is the number one reason a cover that fit last summer won't seat in January. Plastic stiffens as it cools, clips lose their flex, and the retention ring won't stretch over the rim lip. The cover isn't wrong, it's just too rigid to snap.
Warm the Cover Before You Fight It
Warm plastic flexes; cold plastic cracks. Bring the cover inside for at least an hour before you install it, or set it in direct sun on a dark surface. A common pattern is that a cover which feels impossible in a 20°F garage seats with normal palm pressure once it's been indoors. Don't use a heat gun or a torch, uneven heat warps the face and softens the clips unevenly, which is worse than leaving it cold.
If you're installing outside in winter, keep the covers in the house until the moment you walk out, and work on one wheel at a time so the spare covers stay warm.
Diagnose the Retention Ring Before You Press
The retention ring is the metal or plastic band around the back edge of the cover that carries the clips. If it's damaged, no amount of hand pressure will hold the cover on. Check it in this order:
- Lay the cover face-down on a flat surface and look at the ring's profile. It should sit evenly all the way around with no flattened or kinked section.
- Run a finger along the inside of the ring. A bent tab or a cracked clip is usually obvious by feel before it's visible.
- Compare the gap between the ring and the cover's outer edge at four points, top, bottom, and both sides. An uneven gap means the ring is distorted.
- Flex one clip gently with your thumb. It should spring back. A clip that stays bent or feels brittle is done.
Adjusting Ring Tension by Hand
Some covers have retention rings you can tune without tools. On covers with segmented metal tabs, you can gently bend an individual tab outward a few degrees with your thumbs to increase grip, or inward to loosen a cover that's too tight to seat. Work in small increments, a tab bent too far won't spring back and the cover will sit crooked.
On covers with a continuous wire ring, you generally can't adjust tension by hand without risking a kink. If a continuous-ring cover won't seat after warming, the ring is likely stretched or the cover is the wrong size. Replace it rather than forcing it.
One driver in an auto repair forum thread reported being unable to snap the final lip into place after removing and repositioning a plastic cover. That's a single report, not a test, but it matches what we hear often: once a cover is bent, hand pressure alone rarely fixes it.
How to Remove Hubcaps Without Tools (So You Can Reinstall Them)
Removal is the reverse of installation, and on most plastic covers it's just as tool-free. The goal is to release clips one at a time instead of fighting the whole ring at once.
The Hand-Release Method
- Grip the cover's outer edge at the point closest to a clip, usually near the valve stem cutout, since that's where the cover is thinnest.
- Pull straight out toward you, not sideways. Sideways force bends the ring.
- As soon as you feel one clip release, move your hands one clip position around the rim and repeat.
- Work your way around until the cover pops free. It usually releases on the last two clips at once.
If a clip won't release, press inward on the cover face directly above that clip while pulling the edge. That inward pressure takes tension off the clip so it can clear the rim lip.
When a Cover Genuinely Won't Come Off by Hand
Some covers, particularly ones with metal tension tabs or a continuous wire ring, are designed to resist hand removal. For those, the tool-free options are limited:
- Use the spare tire tool or the lug wrench handle from your trunk as a lever against the rim edge, working slowly around the circumference.
- Use a plastic trim tool if you have one. Plastic won't scratch an alloy wheel the way a metal pry bar will.
- Never use a metal pry bar or screwdriver against an alloy wheel. It gouges the finish, and the gouge is permanent.
If you're removing covers to swap on winter tires, label them so they go back on the same wheel. Covers wear into the wheel they've been seated on, and a cover moved to a different wheel may not seat the same way.
What to Check Before You Reinstall
Once the cover is off, look at the back before you set it aside:
- Any clip that's cracked, missing, or bent flat won't hold on reinstall.
- A retention ring that's out of round will fight you going back on.
- A cover that's warped across the face won't sit flat no matter how well the clips grip.
Set the cover face-up on a soft surface so the ring doesn't take a set from resting on a hard floor. A cover that sits ring-down on concrete for a season can develop a flat spot that shows up as a rattle at speed.
Where to Buy Factory Replacement Hubcaps That Fit the First Time
Fitment is the whole game, and that's where buying online beats guessing at a parts store.
When you shop for replacement hubcaps, match three things:
- Wheel diameter in inches
- Clip or retention style
- Original equipment look, if you want a factory match
WheelCovers.Com stocks over 1 million hubcaps, wheel covers, and wheel skins, including original styles for older vehicles. Our online ordering walks you through year, make, and model so you can confirm the fit before you buy. That beats digging through a salvage yard for a match that may not exist.
| What to Check | Why It Matters | Where to Find It |
|---|---|---|
| Wheel diameter | Wrong size won't seat | Tire sidewall or owner's manual |
| Clip style | Wrong clips won't grip | Back of the old cover |
| Valve stem cutout | Misalignment causes rub | Compare to old cover |
| Finish and style | Matches factory look | Photos on the product page |
Shoppers ask us all the time whether we stock parts for older vehicles. We do. Our inventory covers decades of models, not just recent years.
Conclusion: Fitment Beats Force Every Time
Every stubborn cover we've seen traces back to the same root cause: a mismatch between cover and wheel, or a bent retention ring that no amount of pressure will fix. Force damages clips. Fitment doesn't.
If you're replacing a lost or cracked cover, start with the right part. WheelCovers.Com offers a nationwide selection of original and custom hubcaps, an easy online ordering process, and a catalog built around exact fitment, so you skip the junkyard hunt.
Get started with WheelCovers.Com and find a cover that seats by hand the first time.
Frequently Asked Questions
Can you install hubcaps without using any tools?
For most consumer wheel covers, yes. AutoZone's instructional resources confirm that standard covers are designed to be pressed on by hand, with a gentle mallet used only if needed. The cover's retention ring grips the wheel's steel rim once it's fully seated. That said, installation requirements vary by cover and procedure, so check the instructions for your specific product rather than assuming every install is tool-free. A difficult cover may need more than simple pressing and wiggling.
How do I know if my wheel cover is fully seated?
Walk around the cover and press the outer edge at four points. A seated cover flexes slightly but does not move in or out, and the gap between the cover edge and the rim stays even all the way around. Spin the wheel by hand or drive slowly and listen for rattles. If one section rocks or pops, the retention ring isn't fully engaged at that point. Reposition and press that area again before driving at speed.
What should I do if my wheel cover feels loose after installation?
Remove the cover and inspect the retention ring for bends or cracks. A slightly bent ring can often be eased back by hand. Clean any rust or debris off the wheel's outer lip, since buildup prevents the ring from gripping. In cold weather, bring the cover indoors to warm up before refitting, because cold plastic loses flexibility. If the ring is cracked or the cover still won't hold tension, the cover is the wrong diameter or worn out and should be replaced.
How do I align the valve stem when installing wheel covers?
Find the valve stem cutout on the back of the cover before you start. Line that notch up with the valve stem on the tire, then hold the cover there with one hand while you press the top edge in with the other. If the cover has multiple cutouts, pick the one that lets the cover sit flush with the rim. Misaligned valve stems are the most common reason a cover won't sit flat, so check this alignment before applying any pressure.