

Posted by Editorial Team on Oct 26, 2026
How Can You Improve Your Car's Appearance on a Budget?
Last Updated: October 25, 2026
Quick Summary
You can improve car appearance budget through deep cleaning, headlight restoration, LED lighting upgrades, wheel cover replacement, waxing, interior refreshes, and trim restoration. These seven methods deliver dramatic visual impact without requiring major expenses or professional services.
- Deep cleaning with a two-bucket wash method and microfiber drying instantly makes your car look newer and better maintained
- Headlight restoration using fine-grit sandpaper and UV coating takes 30 minutes per light and ranks among the most noticeable improvements
- Replacing wiper blades and restoring faded black plastic trim costs less than a tank of gas but changes how your car reads at a glance
- LED interior dome and map lights in 4000K-5000K color temperature modernize your cabin in under an hour
- Quality wheel covers in the correct size for your vehicle transform curb appeal and install in 10-15 minutes per wheel
Table of Contents
- Why Car Appearance Matters and Where to Start
- Deep Cleaning and Exterior Detailing on a Budget
- Restore Clarity with Headlight Restoration
- Upgrade to LED Lighting for Modern Appeal
- Refresh Your Wheels with 16 Inch Wheel Covers
- Paint Protection and Waxing for Long-Term Shine
- Car Interior Upgrades on a Budget
- Quick Wins: Trim Refresh and Vinyl Accents
- Finding the Right Wheel Covers for Your Vehicle
- Frequently Asked Questions
Why Car Appearance Matters and Where to Start
Your car's appearance is the first thing people notice. A well-maintained vehicle commands respect on the road and holds its value better over time. The good news: you don't need a large budget to improve car appearance budget and make a real difference.
At WheelCovers.Com, we've helped vehicle owners refresh their cars affordably. The most impactful improvements combine smart choices with elbow grease.
This guide covers seven proven ways to improve car appearance on a budget. We'll show you which upgrades deliver the biggest visual impact, which ones you can tackle yourself, and where to spend your money wisely. The goal is simple: make your car look newer and cleaner without breaking the bank.
Deep Cleaning and Exterior Detailing on a Budget
A deep clean transforms your car more than any single upgrade. Dirt, grime, and oxidation hide your car's true finish. Remove them, and you've already improved car appearance significantly.
Start with a thorough wash using a two-bucket method. One bucket holds soapy water, the other clean rinse water. This prevents dirt from scratching your paint. Wash from top to bottom in straight lines, not circles.
After washing, dry with a microfiber towel. Water spots are the enemy of a polished look. A clean, dry car immediately looks newer.
Next, clean your wheels. Brake dust builds up and makes even new wheels look tired. Use a wheel-specific cleaner and a soft brush. Pay attention to the inside edges where grime hides.
Interior detailing matters too. Vacuum thoroughly, wipe down all surfaces, and clean your windows inside and out. A spotless interior makes your car feel premium.
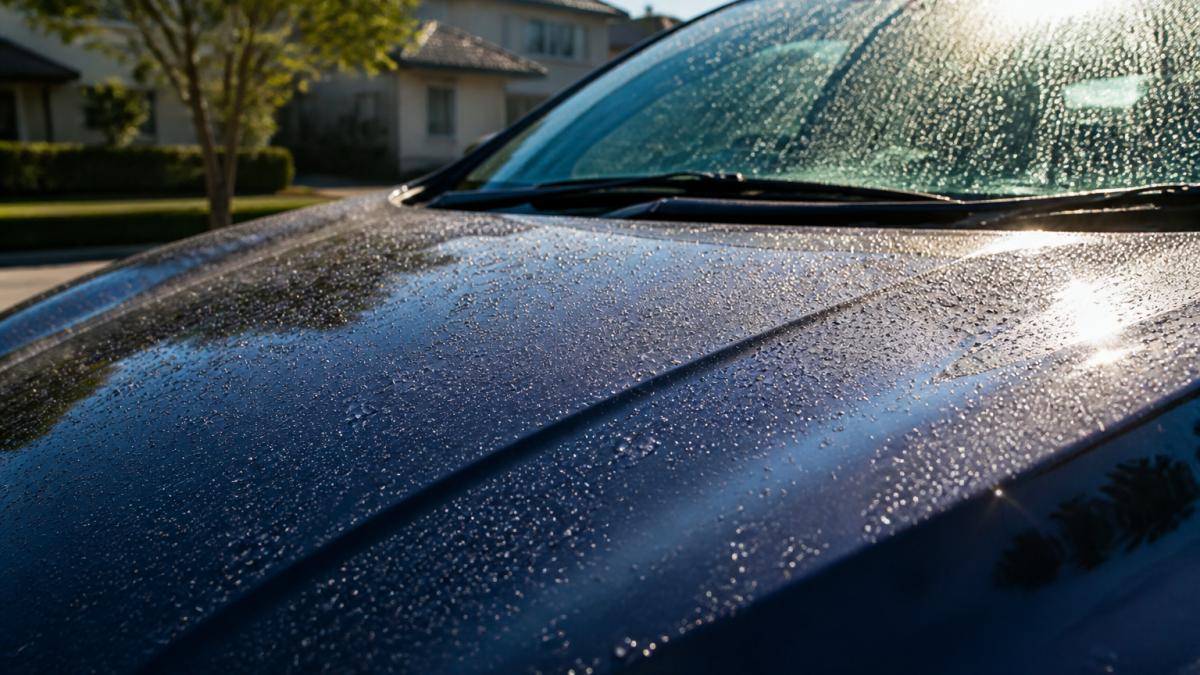
Key steps for budget detailing:
- Use a two-bucket wash method to prevent scratches
- Dry immediately with microfiber towels
- Clean wheels with a dedicated wheel cleaner
- Wipe interior surfaces and vacuum thoroughly
- Clean windows inside and out for maximum clarity
This approach costs minimal money but requires time and effort. The payoff is immediate and dramatic.
Restore Clarity with Headlight Restoration
Cloudy headlights age your car instantly. UV exposure and oxidation turn clear lenses yellow and hazy over months. Restoring them is one of the highest-impact budget upgrades available.
You have two options: professional restoration or DIY kits. Professional services cost more but deliver superior results. DIY headlight restoration kits work well for moderate haziness.
For DIY restoration, start with fine-grit sandpaper (2000-3000 grit). Sand the headlight surface in circular motions until the haze begins to lift. Progress to higher grits (4000-5000) for a smoother finish.
After sanding, apply a UV-protective coating. This prevents the haziness from returning quickly. The entire process takes about 30 minutes per headlight.
Clear headlights instantly make your car look better maintained and safer. This upgrade consistently ranks among the most noticeable improvements owners make.
Upgrade to LED Lighting for Modern Appeal
LED interior lighting is one of the cheapest ways to make a car feel newer, but the section most guides skip is the part that actually matters: choosing the right bulb, avoiding error codes, and staying legal. Here is the practical version.
Start with the bulbs you actually see. Dome lights, map lights, and trunk lights are the highest-visibility interior bulbs and the easiest to swap. Most dome and map bulbs are festoon-style (a cylindrical glass tube with metal caps on each end) or wedge-base (a small glass wedge that pushes into a socket). Pull the old bulb, match its length and base type, and order the LED equivalent. Trunk and glovebox bulbs are usually the same wedge style and take minutes.
Match color temperature to the cabin, not to a trend. LED bulbs are sold by color temperature in kelvin (K). Roughly:
- 2700K-3000K, warm white, closest to the original incandescent glow; safest choice for older interiors.
- 4000K-5000K, neutral/cool white; reads as modern without looking blue.
- 6000K and up, noticeably blue; can look aftermarket and washes out tan or brown interiors.
A common pattern is 4000K-5000K for dome and map lights, and warmer bulbs anywhere the light spills onto faces or rear-seat passengers.
Watch for CANbus and polarity issues. Many newer vehicles monitor bulb resistance and will throw a dashboard warning or flicker if an LED draws too little current. Two fixes: buy "error-free" or "CANbus-ready" LEDs with a built-in resistor, or add an inline load resistor. Also check polarity, LEDs are directional, and if a bulb doesn't light, flip it in the socket before assuming it's defective.
Keep exterior lighting legal and aimed correctly. Interior LEDs are low-risk. Exterior LED swaps are where budget shoppers get into trouble:
- Headlight housings are designed for a specific bulb type. Dropping an LED bulb into a halogen reflector housing often scatters light into oncoming traffic and can fail state inspection. If you upgrade headlights, use a purpose-built LED housing or a projector retrofit, not a bulb swap into a reflector.
- Color matters. Most states restrict forward-facing lights to white or amber and restrict red and blue to emergency vehicles. Check your state's lighting statute before buying colored bulbs.
- Aim headlights after any change. Park 25 feet from a wall on level ground and adjust so the cutoff sits slightly below the height of the lamp, this is the same procedure shops use and it takes about 10 minutes.
Skip the gimmicks. Under-glow, flashing brake-light modulators, and colored interior strips that reflect in the windshield at night are the upgrades most likely to look dated in a year or draw a fix-it ticket. Spend the money on clean white dome and map lighting instead.
Done well, an LED interior refresh takes under an hour, costs less than a tank of gas, and makes the cabin read as a newer model year every time you open the door.
Refresh Your Wheels with 16 Inch Wheel Covers
Your wheels are the foundation of your car's appearance. Damaged or worn wheel covers immediately make your car look neglected. Replacing them is one of the most effective ways to improve car appearance budget.
Wheel covers serve both aesthetic and protective functions. They shield your wheels from road salt, debris, and UV damage. A fresh set transforms your entire car's curb appeal.
WheelCovers.Com specializes in finding the exact fit for your vehicle. With over 1 million wheel covers in inventory, we carry original replacements and custom options.
The process is simple: identify your vehicle year, make, and model, then browse available options. Original wheel covers maintain factory authenticity. Custom options let you personalize your vehicle's look.
Key advantages of quality wheel covers:
- Immediate visual transformation
- Protection for your wheels underneath
- Easy installation (usually 10-15 minutes per wheel)
- Available in original factory styles or custom designs
- Affordable compared to wheel replacement
Installing new wheel covers takes minimal time and requires no special tools. Simply remove the old covers and snap the new ones into place.
Paint Protection and Waxing for Long-Term Shine
A protective coat keeps your paint looking fresh and vibrant. Wax creates a barrier against UV rays, salt, and environmental contaminants. This simple step preserves your car's appearance for months.
Apply wax every three months for best results. Start with a clean, dry car. Use a foam applicator pad to work the wax in circular motions. Let it haze slightly, then buff with a microfiber towel.
Quality wax costs little but delivers noticeable results. Your car's finish becomes deeper and more reflective. Water beads off rather than pooling on the surface.
Paint protection film offers long-term defense for high-impact areas. Apply it to the front bumper, hood, and door handles. This transparent film prevents rock chips and scratches while remaining invisible.
Waxing and protection steps:
- Wash and dry your car thoroughly first
- Apply wax with circular motions using a foam pad
- Buff away haze with a clean microfiber towel
- Repeat every three months for maintained shine
- Consider paint protection film for vulnerable areas
Regular waxing keeps your car's appearance consistent. Your finish stays glossy and protected throughout the year.
Car Interior Upgrades on a Budget
Your interior deserves attention equal to your exterior. Worn seat covers and stained upholstery make even new cars look tired.
Seat covers are the quickest interior upgrade. They protect original upholstery and instantly refresh your cabin. Choose colors that complement your car's interior or contrast boldly.
Floor mats protect carpeting and add visual definition. Quality mats feature non-slip backing and durable construction. They're one of the first things passengers notice.
Upgrade your steering wheel cover for a more premium feel. Leather or suede covers add grip and sophistication. Your hands spend significant time on the wheel, so this upgrade affects your daily experience.
Add air fresheners that match your style. A clean-smelling interior enhances the perception of a well-maintained car.
Interior upgrade priorities:
- Seat covers for immediate visual refresh
- Floor mats for protection and definition
- Steering wheel cover for premium feel
- Air freshener for cleanliness perception
- Dashboard covers to hide wear
These upgrades work together to create a cohesive, modern interior. Your car feels newer and more personal.
Quick Wins: Trim Refresh and Vinyl Accents
This is the section where a ranked, mistake-aware approach beats the generic "clean your trim and add vinyl" advice most guides offer. These are the lowest-cost, highest-visibility changes in the whole article, but only if you pick the right ones and skip the ones that look cheap.
Ranked by impact per dollar (highest first):
- Wiper blade replacement. Old, streaking blades are the single most overlooked sign of a neglected car, and new blades are one of the cheapest fixes available. Match the length listed in your owner's manual (driver and passenger sides are often different lengths), and replace the whole blade assembly rather than just the rubber refill on most modern hook-style arms. Expect to replace them every 6-12 months depending on sun exposure.
- Faded plastic trim restoration. Oxidized black plastic, bumper trim, mirror caps, window surrounds, turns chalky gray and makes a car look a decade older. Clean with a dedicated trim cleaner, then apply a trim restorer (a polymer or ceramic-based dressing, not a silicone tire shine that slings off). Restoration lasts weeks to months; a ceramic trim coating lasts longer but costs more.
- Chrome and metal polish. Chrome window trim, grille surrounds, and exhaust tips respond well to a fine metal polish and a microfiber cloth. This is a 20-minute job with a visible payoff and no risk.
- Badge and emblem refresh. Replacing faded or peeling badges with factory-style replacements is reversible and looks correct. Avoid oversized or mismatched aftermarket badges, they are the most common "looks out of place" mistake.
- Vinyl accents. Vinyl wrap film is removable and does not damage the surface underneath, which makes it the safest way to try a custom look. Good uses: accent stripes, mirror caps, roof panels, and interior trim pieces. Bad uses: covering rust, wrapping over peeling clear coat, or applying film to textured plastic without an adhesion promoter, all of which fail within months.
What to skip. These are the low-value upgrades that eat a budget without improving appearance:
- Stick-on chrome trim and vent ports, they trap dirt, peel at car washes, and read as aftermarket.
- Colored badge overlays that clash with the paint.
- Cheap vinyl that isn't rated for outdoor UV exposure; it fades and shrinks within a season.
- "Restoring" trim with tire shine, it looks good for a day and slings onto paint.
Reversibility matters. Every item on this list can be undone: badges unclip, vinyl peels, trim dressing washes off. That makes this section the safest place to experiment if you're unsure what look you want.
These changes require minimal investment and time, and because they're reversible, you can test a look before committing to anything permanent.
These upgrades deliver the highest visual impact per dollar spent, ranked by effectiveness.
| Upgrade | Impact | Best For | Notes |
|---|---|---|---|
| Wiper blade replacement | Highest | Neglected appearance | Replace every 6-12 months |
| Faded plastic trim restoration | Very high | Oxidized bumpers and trim | Lasts weeks to months |
| Chrome and metal polish | High | Window trim and grille | 20-minute job with visible payoff |
| Badge and emblem refresh | Medium | Factory-style replacements | Avoid oversized aftermarket badges |
| Vinyl accents | Medium | Stripes, mirror caps, roof | Removable and non-damaging |
Finding the Right Wheel Covers for Your Vehicle
Selecting the correct wheel covers ensures proper fit and maximum visual impact. Wrong-sized covers look awkward and may not stay secure.
Start by identifying your vehicle's wheel size. Check your owner's manual or look at your current wheel covers. Common sizes include 14, 15, 16, and 17 inches. Your specific vehicle uses one specific size.
Document your vehicle year, make, and model. These details narrow your options significantly. Many wheel covers are model-specific to ensure perfect fit.
WheelCovers.Com makes this process straightforward. Enter your vehicle information on our website, and we display compatible options. Our inventory includes original factory replacements and custom designs.
Selection criteria for wheel covers:
- Correct wheel size for your vehicle
- Matching bolt pattern configuration
- Vehicle year, make, and model verification
- Original factory style or custom design preference
- Aesthetic goals for your car's appearance
Take time to review available options. Quality wheel covers make a lasting impression on your car's overall appearance.
Frequently Asked Questions
What are the cheapest ways to improve a car's appearance?
The most affordable improvements are deep cleaning, waxing, and headlight restoration, which use elbow grease and inexpensive supplies. LED interior lights and new wheel covers deliver high visual impact for modest investment. Detailing your car yourself rather than paying for professional service cuts costs significantly while still transforming how your vehicle looks.
Can new wheel covers really improve the look of a car?
Yes. Wheel covers are one of the most visible upgrades on any vehicle. Swapping out damaged or dated wheel covers for fresh 16 inch wheel covers or custom designs instantly modernizes your car's appearance. Since wheels are at eye level and draw immediate attention, upgrading them delivers outsized visual impact relative to cost.
How long does headlight restoration last?
Professional headlight restoration typically lasts 2-3 years depending on UV exposure and weather. DIY kits using polishing compounds offer similar durability. To extend results, apply UV-protective coating after restoration. Regular cleaning helps maintain clarity longer. If headlights cloud again, you can repeat the restoration process rather than replace the entire assembly.
What car interior upgrades give the best value on a budget?
Seat covers, new floor mats, and interior LED lights offer the highest return on investment for car interior upgrades on a budget. These changes are visible every time you enter the vehicle and cost far less than reupholstering or refinishing. A deep interior clean, fresh air freshener, and organized storage also refresh the space without significant spending.
Improving your car's appearance on a budget is entirely achievable. These seven approaches deliver real visual transformation without expensive repairs or replacements. Start with deep cleaning and detailing, then progress to upgrades like LED lighting and wheel covers. WheelCovers.Com offers an extensive selection of wheel covers and hubcaps to complete your refresh, with over 1 million products available and nationwide shipping to get your new covers installed quickly.
