

Posted by Editorial Team on Oct 29, 2026
How to Replace a Hubcap: Measuring, Installing and Fixing a Loose Cap
Last Updated: October 30, 2026
Quick Summary
A hubcap replacement starts with measuring the wheel's diameter at the bead seat, the lug count and bolt pattern, and the center bore, then matching the cap's attachment style. Snap-on, lug-mounted and bolt-on caps each need the right fit, and installing one takes about 10 minutes.
- Measure wheel diameter at the bead seat, not the outer lip of the rim.
- Count the lug nuts and measure the bolt pattern before ordering a cap.
- Measure the center bore, since center caps must seat in it to grip.
- Pry off the old cap with a plastic tool to avoid cracking it or scratching the wheel.
- Recheck every cap after a short drive, because loose caps often point to a fit or wear problem.
Table of Contents
- Hubcaps, Center Caps and Wheel Covers: What the Terms Mean
- How to Measure Wheel Size for Hubcaps
- Choosing the Right Replacement Cap: Designs, Materials and Attachment Methods
- Tools You Need and How to Remove a Hubcap Safely
- Hubcap Installation Step by Step
- Why a Hubcap Keeps Falling Off and How to Fix It
- Common Mistakes to Avoid During Replacement
- When to Stop DIY and Call a Mechanic
- Ordering Your Replacement Hubcap from WheelCovers.Com
- Frequently Asked Questions
Hubcaps, Center Caps and Wheel Covers: What the Terms Mean
Most people use "hubcap," "center cap," and "wheel cover" to mean the same thing. They are not quite the same. A hubcap is a round cover that sits over the wheel's center hub and typically snaps or clips onto a steel wheel. A center cap is smaller and fits only the middle of an alloy wheel. A wheel cover is a larger decorative piece that covers most of a steel wheel's face, leaving only the lug nuts exposed.
Knowing which one you need matters before you order anything. If you buy a wheel cover when your car takes a center cap, it will not fit. The first step is identifying which style your vehicle uses.
Look at the wheel itself:
- Steel wheel with a large round cover: You likely need a hubcap or wheel cover.
- Alloy wheel with a small disc in the middle: You need a center cap.
- Trim ring around the wheel's edge: You may need a trim ring, which is a separate part.
Your owner's manual or the wheel's markings can also help. A quick photo of the wheel, taken straight on, is often enough to match the right style.
How to Measure Wheel Size for Hubcaps
Wheel diameter is the number that decides whether a cover will fit, but diameter alone is not enough when you shop for a hubcap replacement. Two wheels that are both 16 inches can take different caps because the retaining surface, the lug pattern, and the center bore differ. Measure all four before you order.
1. Read the tire sidewall for a starting diameter. A size like "P215/65R16" ends in the wheel diameter, here, 16 inches. This is the rim diameter the tire is mounted on, not the outside diameter of the tire. Treat it as a starting point and confirm it against the rim.
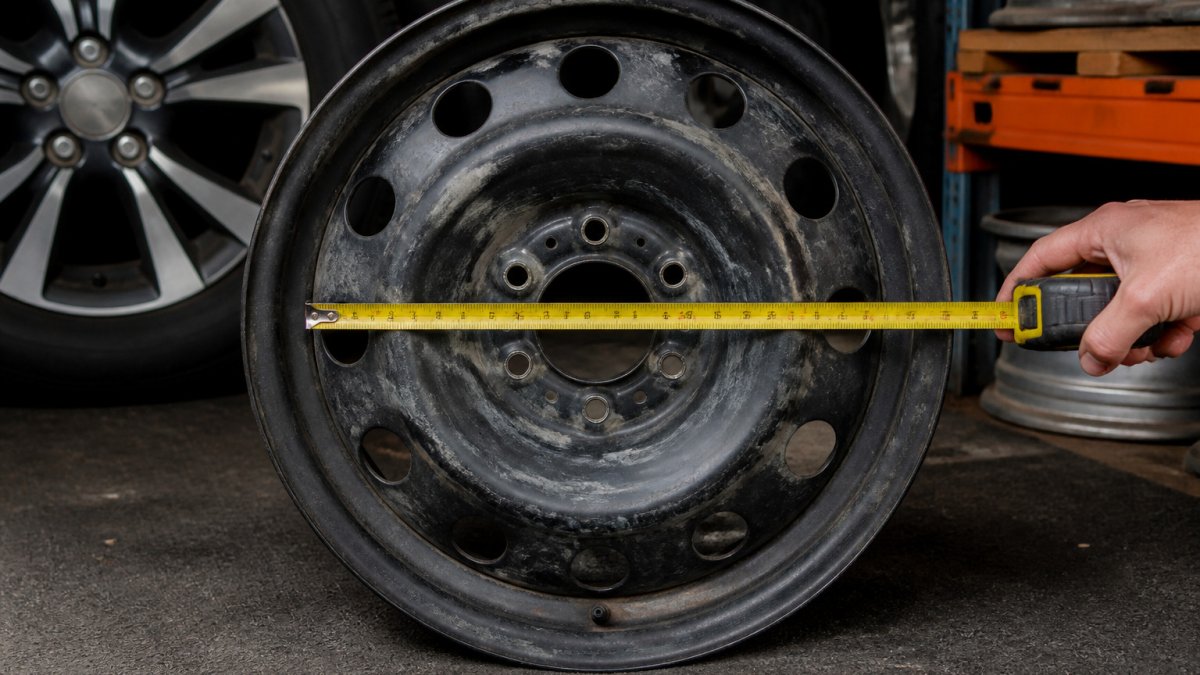
2. Measure the rim diameter at the bead seat. The bead seat is the inner ledge where the tire's bead sits, not the outer lip of the rim. Lay a tape measure across the wheel through the center and measure from bead seat to bead seat. If you measure to the outer flange instead, you will read about an inch larger than the true wheel diameter and order the wrong cap. Most passenger vehicles use wheels between 13 and 20 inches; trucks and larger SUVs run higher.
3. Count the lug nuts and note the bolt pattern. Count the studs on one wheel. Then measure the bolt pattern: for a 5-lug wheel, measure from the center of one stud to the center of the stud two positions away (not the adjacent one). For a 4-, 6-, or 8-lug wheel, measure straight across from stud center to opposite stud center. Lug-mounted and bolt-on caps are held by these fasteners, so a mismatch here means the cap cannot attach at all.
4. Measure the center bore. The center bore is the hole in the middle of the wheel that fits over the hub. Measure its inside diameter with a tape or caliper. Center caps seat inside or over this bore, so a cap sized for a larger bore will not grip.
5. Measure the cap seat, not just the wheel. For snap-on covers, the retaining clips grip a specific inner lip on the wheel. Measure the inside diameter of that lip where the old cap's clips contacted it. If you still have the old cap, measure its outer diameter across the clip line and match that number, it is the most reliable single measurement you can take.
Checking Your Vehicle Fit Before You Order
Before you buy, confirm five things:
- Wheel diameter, measured at the bead seat in inches
- Whether the wheel is steel or alloy
- Lug count and bolt pattern
- Center bore diameter
- Attachment style: snap-on clips, lug-mounted, or bolt-on
With these details you can narrow the search on the WheelCovers.Com site. Trim level matters too: the same model year can ship with different wheels across trims, so confirm the wheel on your vehicle rather than the brochure photo.
Choosing the Right Replacement Cap: Designs, Materials and Attachment Methods
Attachment methods:
- Snap-on or clip-on: Pressed onto the wheel with retaining clips. This is the most common style for steel wheels.
- Lug-mounted: Held in place by the lug nuts. Pop-off styles often use this method.
- Bolt-on: Secured with a central bolt or screw. These fit tightly and rarely fall off.
Common materials:
- ABS plastic: Lightweight, affordable, and resistant to weather. Good for everyday driving.
- Metal: Heavier and more durable, with a more premium look.
- Chrome or painted finishes: Chrome looks bright but shows scratches. Painted finishes match a vehicle's color but can chip.
Pick the material based on how you drive and where you park.
The main choices come down to how the cap attaches, what it is made of, and how it finishes.
| Option | Key point | Best for |
|---|---|---|
| Snap-on or clip-on | Pressed on with retaining clips | Most steel wheels |
| Lug-mounted | Held by the lug nuts | Pop-off styles |
| Bolt-on | Secured with a central bolt or screw | Tight fit, rarely falls off |
| ABS plastic | Lightweight, affordable, weather resistant | Everyday driving |
| Metal | Heavier, more durable, premium look | Durability and a premium look |
| Chrome or painted | Chrome shows scratches; paint can chip | Matching the vehicle's color or a bright look |
Tools You Need and How to Remove a Hubcap Safely
Removing an old hubcap is easier than most people expect, but a rushed attempt can crack the cover or scratch the wheel.
Tools to gather:
- A flat plastic pry tool or a thin, padded screwdriver
- A rubber mallet or the heel of your hand
- A microfiber cloth to protect the wheel surface
- Gloves, if you want a better grip
Steps to remove it safely:
- Park on level ground and loosen the lug nuts slightly before lifting the car.
- Slide the pry tool under one edge of the hubcap. Wrap the tip in cloth to protect the finish.
- Work the tool gently around the edge until the cap begins to lift.
- Pull the cover free with both hands. Avoid bending it.
Watch out: forcing a hubcap with a metal screwdriver can crack the plastic or gouge the wheel.
Hubcap Installation Step by Step
Installing a new cap takes about 10 minutes. The key is pressing evenly so the clips seat correctly.
- Line up the cap with the wheel. Match the valve stem hole to the valve stem on the wheel.
- Press the cap onto the wheel's center. Start with one edge and work around the circle.
- Push firmly on opposite sides. Press one side, then the side across from it, to seat the retaining clips.
- Check the fit. The cap should sit flush with no gaps. Give it a light tug to confirm it holds.
Repeat the process for each wheel. Drive a short distance, then check that every cap is still secure.
Why a Hubcap Keeps Falling Off and How to Fix It
A cap that pops off once is usually an installation problem. A cap that keeps coming off is a fit or wear problem, and replacing it with the same part will just repeat the failure. Work through the causes in the order below, each step rules out the one before it.
Step 1: Confirm the cap is the right size for the wheel. Compare the cap's outer diameter at the clip line to the wheel's cap seat. A cap that is slightly too small will seat but not grip; one that is slightly too large will sit proud and catch air. If the old cap came off cleanly with no broken clips, suspect sizing first.
Step 2: Inspect the retaining clips and ring. Look at the clips inside the cap. Bent clips, cracked clip bases, or a rusted or distorted retaining ring are the most common cause of a cap that held for years and then started falling off. A clip that has lost its spring tension cannot be bent back reliably, replace the cap or, where the design allows, the clip set.
Step 3: Clean the mating surfaces. Grit, dried road salt, and brake dust on the wheel's cap seat stop the clips from seating fully. A cap that feels tight but still works loose is often sitting on debris. Clean the seat and the clip ring with a soft brush and a damp cloth, then dry before reseating.
Step 4: Check for wheel or hub damage. A bent wheel lip, a distorted cap seat, or a hub that is out of round will not hold any cap. Look for a wobble when the cap is seated and for runout at the rim edge. If the wheel is damaged, a new cap will not fix it, see the mechanic guidance below.
Step 5: Rule out heat and age. Plastic caps can warp after repeated heat cycles from brakes and summer pavement, and the warp shows up as a cap that no longer sits flush. Compare the cap against a flat surface; a rocking cap is warped and should be replaced.
Fixes by cause:
- Wrong size: return or exchange for the correct diameter and attachment style.
- Worn clips or ring: replace the cap; clip-only repairs are limited to designs that sell serviceable clips.
- Debris: clean and reseat, then recheck after a short drive.
- Wheel or hub damage: stop and have the wheel inspected before fitting another cap.
- Warped plastic: replace with a UV-resistant cap or a metal or bolt-on style if the vehicle sees harsh conditions.
After any fix, drive a short distance and recheck every cap. A cap that survives the first drive and a second check a week later is usually seated correctly.
Common Mistakes to Avoid During Replacement
- Ordering without measuring. Many returns happen because the wheel size was guessed.
- Ignoring the attachment method. A lug-mounted cap will not work on a snap-on wheel.
- Pressing only one side. Uneven pressure leaves the cap loose.
- Skipping the test drive check. Recheck caps after the first short drive.
- Using metal tools on plastic. Scratches and cracks are easy to avoid with a plastic pry tool.
When to Stop DIY and Call a Mechanic
Stop and call a professional if the wheel is bent, the lug nuts are stripped, or the cap cracks during removal. Also get help if you see wheel damage, uneven tire wear, or a vibration while driving. These signs can point to a problem with the wheel or hub, not the cap.
A tire shop or mechanic can check the wheel and hub safely. They can also confirm that the replacement cap does not interfere with the brake assembly.
Ordering Your Replacement Hubcap from WheelCovers.Com
WheelCovers.Com is a family-owned supplier with nearly 50 years in the business. Its inventory covers more than 1 million hubcaps, wheel covers, wheel skins, and trim rings. Original and custom options are both available, and orders ship nationwide, so you can skip the trip to a salvage yard.
Before you order your hubcap replacement, have your wheel diameter, wheel type, and lug count ready. For current prices and availability, check the WheelCovers.Com website or request a quote directly, since pricing depends on the style, quantity, and delivery.
When you are ready, shop the full selection at WheelCovers.Com and find the cap that matches your wheels.
Frequently Asked Questions
How do I replace a hubcap?
Measure the wheel first so you order the right diameter and attachment style. Then remove the damaged cap with a flat tool, seat the new cap against the wheel, and press firmly on opposite sides until it clicks or locks into place. Check that it sits flush and does not wobble. Most single replacements take under fifteen minutes per wheel once you have the right part in hand.
How do I know what size hubcap I need?
Measure the outer diameter of your steel wheel from one edge of the rim to the opposite edge, in inches, and compare it with the listed sizes for the cap. Your vehicle's year, make and model also narrow the fit. Check the existing cap for part numbers or markings, and confirm the attachment style, whether it snaps onto the wheel or is held by retaining clips or lug nuts.
Why does my replacement hubcap keep falling off?
The most common cause is a mismatched diameter or attachment style, so the cap is not held by its retaining points. Other causes include a cap not fully seated, a worn or bent retaining clip, or a wheel with a rim lip that differs from the cap's design. Remove the cap, confirm the fit against your wheel measurement, and reseat it with firm pressure on all sides.
Are hubcaps and wheel covers the same thing?
Not exactly. A hubcap typically covers the entire wheel face on a steel wheel and snaps or clips on, while a center cap covers only the hub area in the middle of an alloy wheel. Wheel covers are a broader term that can refer to either style. Matching the terminology to your wheel type helps you search for the correct replacement.
