

Oct 05, 2026
How to Restore Faded Wheel Covers: Step-by-Step
Table of Contents
- Assess Your Wheel Cover Material Before Restoring
- How to Clean Plastic Wheel Covers Thoroughly
- Step 1: Inspect for Dirt, Oxidation, and Surface Damage
- Step 2: Remove Your Wheel Covers and Clean the Surface
- Step 3: Choose Your Restoration Method Based on Material Type
- Best Plastic Restorer for Car Trim: Application Techniques
- Using WD-40 on Faded Car Plastic: When and How
- How to Protect Plastic Wheel Covers from UV Damage
- When Restoration Isn't Enough: Replacement Options
- Common Mistakes to Avoid When Restoring Wheel Covers
- Frequently Asked Questions
Last Updated: October 5, 2026
Assess Your Wheel Cover Material Before Restoring
Before buying any product, confirm two things: that the part is actually a wheel cover (a hubcap), and what it is made of. Most guides blur these together with wheel-well trim and vintage metal hubcaps, then hand you a method that damages the wrong surface.
Step 1: Confirm you have a wheel cover, not trim
A wheel cover is the removable disc that snaps over a steel wheel. Wheel-well trim (also called wheel arch molding or fender trim) is the curved strip framing the opening above the tire. They fade for the same reason, UV and road grime, but they are different parts with different finishes, and a method that works on one can ruin the other.
How to tell them apart:
- Location. The cover sits on the wheel face, inside the tire bead. Trim runs along the body panel above and around the tire.
- Attachment. Covers pop off by hand or with a plastic pry tool. Trim is usually clipped or adhered to the body and does not come off casually.
- Backside. Flip it over. A wheel cover has retention clips, a steel ring, or snap tabs. Trim has body clips or adhesive tape.
If it does not come off the wheel, stop, you are working on trim, and the rest of this guide is about covers.
Step 2: Identify the base material
Wheel covers fall into four material families, each needing a different restoration path.
- ABS or polypropylene plastic (most common). Light, flexible, and the source of most faded hubcaps. Tapping it gives a dull plastic thud.
- Chrome-plated plastic. A thin chrome layer over a plastic base. It looks like metal but is light and non-magnetic. Once the chrome flakes, you cannot polish it back, you are looking at the plastic underneath.
- Stamped or cast metal (steel, aluminum, stainless). Heavier, cold to the touch, and magnetic if steel. Common on older vehicles and some truck applications.
- Rubber or rubberized trim. Rare on covers themselves but common on the edge strips and center emblems. Feels soft and grippy.
Step 3: Run three quick field tests
Three checks settle it in under a minute.
- Magnet test. A magnet sticks to steel covers and to the steel retention ring on many plastic covers. Do not test the ring, test the face. If the face is non-magnetic, it is plastic, chrome-plated plastic, aluminum, or stainless.
- Weight and temperature test. Metal covers feel noticeably heavier and stay cooler longer than plastic in the same conditions. Plastic warms to the touch quickly.
- Tap and flex test. Tap with a fingernail. Plastic gives a hollow tick; metal gives a sharper ring. Gently flex an edge, plastic bends slightly and springs back; metal does not flex at all.
Step 4: Identify the finish on top of the base material
The base material tells you what the part is; the finish tells you how to restore it. Most guides skip this step, and it is where damage happens.
- Painted plastic. A color coat over plastic, often with a clear coat. Faded paint can sometimes be polished; failed clear coat cannot.
- Unpainted molded plastic. Color is in the plastic itself. It fades to chalky gray and responds to trim restorers and heat, not paint.
- Chrome-plated plastic. A vacuum-metalized layer. It cannot be polished like real chrome; once it pits or peels, replacement is the realistic option.
- Bare or clear-coated metal. Aluminum and stainless can be polished. Painted steel should be treated like painted plastic.
Step 5: Match the material to the method before you start
Use this decision path so you do not waste a Saturday on the wrong approach:
- Unpainted molded plastic, light fade → clean, then trim restorer or a heat treatment.
- Unpainted molded plastic, heavy chalky oxidation → clean, then a mild abrasive or heat, then a UV-protective dressing.
- Painted plastic, intact clear coat → clean, then a fine polish to remove oxidation.
- Painted plastic, failed or peeling clear coat → sand, prime, and repaint, or replace.
- Chrome-plated plastic, flaking → replace. Polishing accelerates the damage.
- Bare aluminum or stainless → clean, then metal polish in stages.
- Painted steel → treat as painted plastic.
Write down what you found before moving on. The next sections assume you know whether you are holding painted plastic, unpainted plastic, chrome-plated plastic, or metal, the wrong product on the wrong finish is the most common way people ruin a set of covers.
How to Clean Plastic Wheel Covers Thoroughly
Before any restoration method, your wheel covers need a thorough cleaning. Dirt, grime, and oxidized residue prevent products from working effectively. A clean surface is the foundation for successful restoration.
Start with warm soapy water and a soft microfiber towel to remove surface dirt without damaging the material. Rinse and dry completely. For stubborn grime, use a dedicated automotive degreaser per the product instructions, skipping this step undermines any restoration product.
Once clean, inspect closely for scratches, deep oxidation, or areas where the finish is gone. These observations guide your choice of restoration method.
Step 1: Inspect for Dirt, Oxidation, and Surface Damage
Examine your wheel covers under natural light. Dirt appears as dark spots or streaks; oxidation as a chalky, dull gray layer; surface damage as scratches, cracks, or worn-away coating.
Test oxidation with a fingernail or soft brush: light oxidation wipes away easily, heavy oxidation needs a more aggressive approach. Cracks or deep gouges may mean replacement is the better choice.
Document the condition with photos to track improvement and to reference if replacement becomes necessary.
Step 2: Remove Your Wheel Covers and Clean the Surface
Remove your wheel covers from the vehicle. Most pull straight off, though some need gentle prying with a plastic tool. Work carefully to avoid damaging the cover or the wheel.
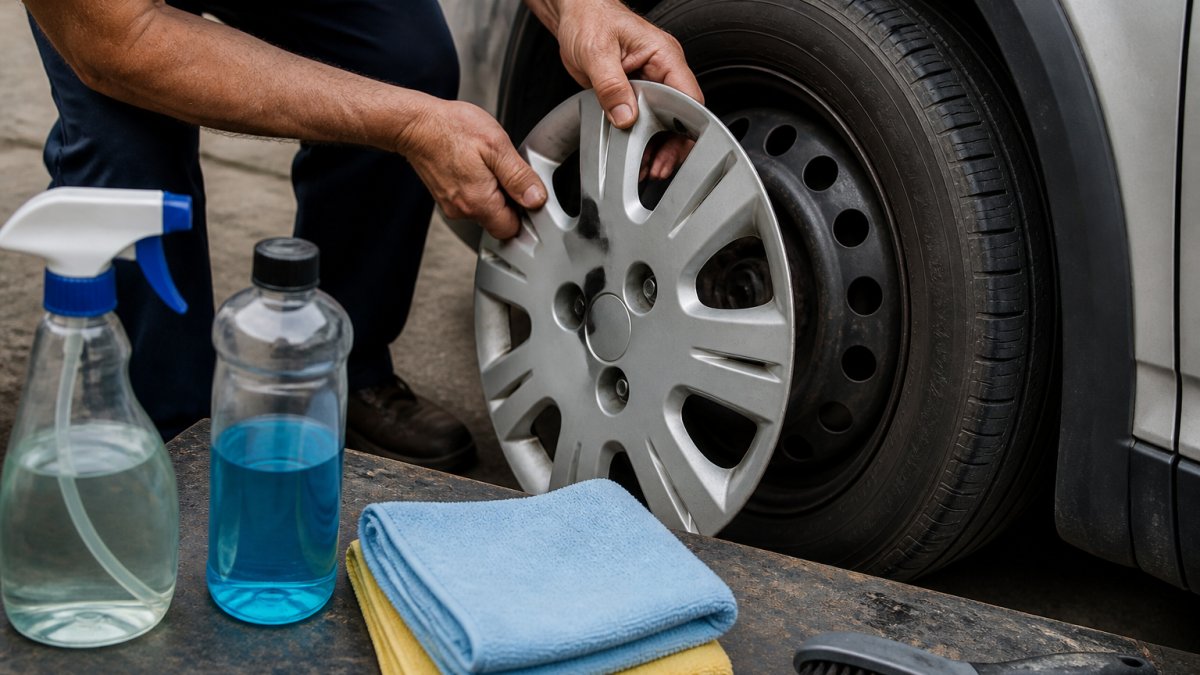
Once removed, place the cover on a clean work surface and wash it thoroughly with warm soapy water and a soft brush, paying special attention to crevices and textured areas. Rinse completely and dry with a microfiber towel.
For heavily soiled covers, soak them in warm soapy water for 15-20 minutes before scrubbing to loosen stubborn dirt. Avoid pressure washers, which force water into crevices and damage the cover.
Step 3: Choose Your Restoration Method Based on Material Type
Most guides stop at "use a plastic restorer," which fails the moment you are holding painted plastic, chrome-plated plastic, or bare metal. Below are four processes matched to the finish you identified, plus safety and compatibility checks.
Safety and compatibility first
Before any solvent, heat, abrasive, or coating touches the cover:
- Work outside or with ventilation. Most trim restorers, degreasers, and paints release vapors. A garage with the door closed is not adequate.
- Wear nitrile gloves and eye protection. Solvent-based dressings and paint strippers absorb through skin.
- Remove the cover from the wheel. Do not spray solvents, heat, or paint near brake calipers, rotors, or rubber brake lines. Overspray on a rotor can contaminate the friction surface.
- Test on a hidden area. The backside of the cover or an inner edge is the right place to confirm a product does not soften, stain, or haze the finish.
- Check compatibility. Silicone-based dressings can interfere with later paint adhesion. Solvent dressings can attack some clear coats. If you plan to repaint, use a water-based or paint-safe prep, not a silicone dressing.
Method 1: Unpainted molded plastic
This is the most common faded hubcap. The color is in the plastic, and it has oxidized to a chalky gray.
Light fade (color dull but not chalky):
- Clean with warm soapy water and a microfiber towel. Dry fully.
- Apply a trim restorer in thin, even coats with a foam applicator. Two to three coats, drying between each.
- Buff off excess with a clean microfiber towel.
Moderate to heavy oxidation (chalky, gray, dry to the touch):
- Clean and dry as above.
- Use a heat treatment: pass a heat gun on low, 6 to 8 inches from the surface, moving continuously. The plastic darkens as the surface oils migrate back up. Stop the moment the color returns, lingering in one spot causes a permanent glossy blotch or warp.
- Follow with a UV-protective dressing to slow re-oxidation.
Alternative for heavy oxidation: a melamine foam sponge (the "magic eraser" type) with light pressure and water. It is a fine abrasive and removes the chalky layer, but it also removes any remaining surface oils, so follow with a restorer.
Durability: trim restorers typically hold 3 to 6 months in full sun and rain. Heat treatment can last longer because it changes the surface rather than coating it, but it re-oxidizes over time. Plan on reapplication or re-treatment seasonally.
Method 2: Painted plastic
Here the color is a paint coat, often with a clear coat on top. You are restoring paint, not plastic.
Intact clear coat, light oxidation:
- Clean and dry.
- Use a fine finishing polish on a foam pad, by hand or with a dual-action polisher on low speed. Work in small sections.
- Wipe residue and apply a paint sealant or wax.
Failed or peeling clear coat:
- Clean and degrease.
- Sand the failed area with 600- to 800-grit wet sandpaper until the edge of the peeling clear coat is feathered.
- Apply a plastic-safe primer, then a color coat matched to the original, then a clear coat. Follow the paint manufacturer's recoat windows exactly, too soon or too late and the layers lift.
- Let it cure fully before reinstalling. Most rattle-can clear coats need several days to reach full hardness.
Durability: a proper repaint with clear coat can last years if the prep was right. A polish-and-seal on intact clear coat lasts a few months.
Method 3: Chrome-plated plastic
This finish is a thin metal layer over plastic. It is not restorable once it fails.
- Light haze or water spots: clean with a non-abrasive chrome cleaner and a soft cloth. Do not use metal polish, it cuts through the thin plating.
- Pitting, flaking, or peeling: there is no home fix. Polishing, sanding, or abrasives make it worse by exposing more plastic. Replacement is the practical path.
Durability: even a well-cared-for chrome-plated plastic cover degrades over years of UV and road salt. Expect a limited service life regardless of care.
Method 4: Bare metal (aluminum, stainless, steel)
- Aluminum and stainless: clean, then polish in stages, a coarser polish first to cut oxidation, then a finer polish to bring up gloss. Use a dedicated metal polish and separate applicators for each stage so you do not cross-contaminate grit.
- Painted steel: treat as painted plastic (Method 2).
- Bare steel: clean, remove rust with a fine abrasive or a rust converter, then seal with a metal protectant or paint to prevent flash rust.
Durability: polished bare metal dulls within weeks in wet or salty conditions unless sealed. A metal sealant extends the shine but needs periodic reapplication.
Choosing between restoration and replacement
Restoration makes sense when the damage is surface-level: oxidation, light scratches, dull color, or a failing clear coat on an otherwise sound part. Replacement is the better call when:
- The cover has cracks, missing pieces, or broken retention clips.
- Chrome plating is pitting or flaking.
- The finish has failed across most of the surface, not just one area.
- You have already restored the same set more than once and the results are not holding.
Add up your materials, your time, and the number of reapplication cycles you will realistically do. When that total approaches the cost of a replacement set, replacement wins on both time and long-term appearance.
Best Plastic Restorer for Car Trim: Application Techniques
A quality plastic restorer revives the color and gloss of faded plastic wheel covers by filling microscopic surface imperfections and adding protective oils. The result is a darker, glossier appearance closer to new.
Apply in thin, even coats with a soft applicator pad or microfiber cloth, working in small sections. Most products need 2-3 coats, each dried completely before the next.
Avoid over-application: too much product leaves sticky residue and can run or drip. A thin, even coat looks better and lasts longer. Work in shade or indoors, as some restorers need protection from direct sunlight while drying.
The restored finish typically lasts 3-6 months depending on weather exposure and the product used. Reapplication maintains the appearance over time.
Using WD-40 on Faded Car Plastic: When and How
WD-40 and similar multi-use lubricants temporarily improve faded plastic by adding moisture and protective oils to the surface, useful for quick results before events or important occasions.
Apply sparingly with a soft cloth and wipe away excess to prevent a slick finish. The improvement is immediate but fades as the product evaporates, so it works best for light fading or as a stopgap while planning a permanent restoration.
WD-40 is not a long-term solution for how to restore faded wheel covers. It doesn't address underlying oxidation and provides minimal UV protection. Use it for quick touch-ups, not as your primary restoration method.
How to Protect Plastic Wheel Covers from UV Damage
Prevention is easier than restoration. Ultraviolet light is the primary cause of plastic fading and oxidation. Protecting your wheel covers from UV exposure slows the fading process significantly.
Park in shade whenever possible, even partial shade reduces UV exposure. If you park outdoors regularly, consider a car cover for extended periods, and apply a quality UV-protective coating after restoration to extend the finish's life.
Reapply protective products annually or after heavy weather. A wax or sealant designed for automotive plastic adds UV blockers and water repellency; this 20-minute step dramatically extends the time between full restorations.
Regular cleaning also helps: dirt and grime trap moisture and accelerate oxidation. Wash your wheel covers monthly with mild soap and water to keep them looking better longer.
The best way to restore faded wheel covers is to prevent fading in the first place. Park in shade, apply UV-protective coatings, and clean regularly. These steps cost less time and money than restoration.
When Restoration Isn't Enough: Replacement Options
Sometimes restoration isn't practical. Heavy oxidation, deep scratches, cracks, or missing pieces mean replacement is the better choice, restoration might improve appearance temporarily, but a new wheel cover lasts.
Replacement wheel covers come in original equipment designs, which match your vehicle's factory specifications exactly, and custom styles with different finishes, colors, or designs.
WheelCovers.Com specializes in original and custom wheel covers with over 1 million products in inventory. With nearly 50 years of industry experience, WheelCovers.Com makes finding the right fit straightforward. Our nationwide shipping gets your new wheel covers to you quickly, and the easy online ordering process eliminates the need to visit salvage yards or local shops.
Comparing restoration materials, repeated applications, and labor, replacement can be a cost-effective option, and restores your vehicle's appearance to like-new condition.
Common Mistakes to Avoid When Restoring Wheel Covers
Many vehicle owners approach wheel cover restoration incorrectly, wasting time and money. Understanding common mistakes helps you achieve better results.
Using the wrong product for your material type is the most frequent error. Metal polish on plastic, plastic restorer on metal, or residue-leaving general-purpose cleaners all disappoint. Identify your material first and choose products designed for it.
Skipping the cleaning step prevents restoration products from working effectively. Dirt and oxidized residue create a barrier. Products cannot penetrate or bond to a dirty surface. Thorough cleaning is non-negotiable.
Over-applying products leaves sticky residue, runs, and drips. Thin, even coats beat thick applications, more product doesn't equal better results.
Expecting permanent results from temporary solutions leads to frustration. WD-40 and similar products provide short-term improvement. Plan for reapplication or choose a more durable restoration method.
Ignoring UV protection means fading returns quickly. Always apply a UV-protective coating after restoration to extend the life of your work.
Attempting restoration on severely damaged covers wastes time when replacement is practical. Deep cracks, large missing pieces, or severe corrosion won't come back to acceptable appearance.
Restoring faded wheel covers involves assessing your material, cleaning thoroughly, and choosing the right restoration method. Light to moderate fading responds well to plastic restorers or trim dressings. Heavy fading, oxidation, or damage often makes replacement the better option. WheelCovers.Com offers original and custom wheel covers that fit your vehicle perfectly, with nationwide shipping and a selection of over 1 million products. Whether you restore your existing covers or replace them with new ones, protecting them from UV damage and maintaining regular cleaning keeps your wheels looking sharp for years to come.
Frequently Asked Questions
Does WD-40 restore faded plastic on wheel covers?
WD-40 can temporarily darken and refresh faded plastic, but it's not a permanent solution. It works best as a quick fix for light fading and provides minimal UV protection. For lasting restoration of wheel covers, dedicated plastic restorers or trim dressings offer better durability and appearance. WD-40 may also attract dust, so reapply every few weeks if you choose this method.
Can sun-faded plastic wheel covers be fully restored to look new?
Severe sun damage may not restore to factory appearance, but most faded wheel covers can be significantly improved. Light to moderate fading responds well to plastic restorers and trim dressings. Deep oxidation or cracking may require sanding or repainting. If restoration doesn't achieve your desired look, replacement wheel covers from WheelCovers.Com can help restore a like-new appearance without the labor.
How do you clean faded wheel covers before restoring them?
Start with soapy water and a microfiber towel to remove dirt and grime. For stubborn residue, use a degreaser or mild detergent. Rinse thoroughly and dry completely. If oxidation is heavy, a magic eraser or fine steel wool can gently remove surface buildup. Always clean before applying any restorer or dressing, products won't adhere properly to dirty surfaces and won't perform as well.
What's the best way to protect wheel covers from fading again after restoration?
Apply a UV-protective coating or sealant designed for automotive plastics after restoration. Park in shade when possible and consider using a car cover in direct sunlight. Reapply trim dressing or plastic restorer every 3-6 months depending on exposure. Regular cleaning also helps prevent oxidation. UV-blocking sprays and coatings are your best defense against future fading and will extend the life of your restoration work.