

Posted by Editorial Team on Oct 18, 2026
How to Measure Wheel Bolt Pattern: Step-by-Step Guide
Table of Contents
- What Is a Wheel Bolt Pattern and Why It Matters
- Tools You Need: Bolt Pattern Measuring Tool Options
- How to Measure Wheel Bolt Pattern: Step-by-Step
- How to Measure a 5-Lug Bolt Pattern (and Other Lug Counts)
- Wheel Bolt Pattern Examples and Conversion Reference
- How to Measure Wheel Size for Hubcaps
- Beyond Bolt Pattern: Other Fitment Checks
- Troubleshooting Conflicting Measurements
- Frequently Asked Questions
Last Updated: October 18, 2026
What Is a Wheel Bolt Pattern and Why It Matters
A wheel bolt pattern is the arrangement of lug holes on a wheel, defined by two numbers: how many holes there are and how wide the circle they form. That circle is the bolt circle, and its width is the bolt-circle diameter. Get either number wrong and the wheel will not seat on the hub.
This matters more than most people expect. A wheel that almost fits is worse than one that clearly doesn't, because it can torque down crooked and work itself loose on the road. At WheelCovers.Com, we've spent nearly 50 years helping drivers match covers and accessories to their vehicles, and a wrong measurement is the single most common reason a part comes back.
The good news: measuring a wheel bolt pattern takes about five minutes with tools you probably own. Below, we'll walk through every lug count, the mistakes that throw off a reading, and how to check the rest of the fitment before you order anything.
Tools You Need: Bolt Pattern Measuring Tool Options
You can measure a bolt pattern with a tape measure or a ruler, but the right tool makes the reading harder to get wrong. Here's what to reach for, ranked by how much guesswork each one removes.
- Tape measure or steel ruler. Fine for four-lug and six-lug wheels, where you measure straight across. Cheap and already in your garage.
- Straightedge and marker. Useful for marking lug-hole centers so you measure center to center, not edge to edge.
- Bolt pattern measuring tool. A dedicated gauge with sliding pins or marked arms that reads the bolt circle directly. Best for five-lug wheels.
- Bolt-pattern gauge or slide ruler. A flat template with common patterns punched through it. You lay it over the hub and see which set of holes lines up.
- Calipers. Overkill for most jobs, but handy for center bore checks.
A common mistake is measuring from the inside edge of one hole to the outside edge of another. That adds roughly half a hole's width to your reading. Always work center to center.
How to Measure Wheel Bolt Pattern: Step-by-Step
Measuring a wheel bolt pattern means counting the lugs first, then finding the diameter of the circle they sit on. The method for the second step changes with the lug count, which is where most guides get vague.
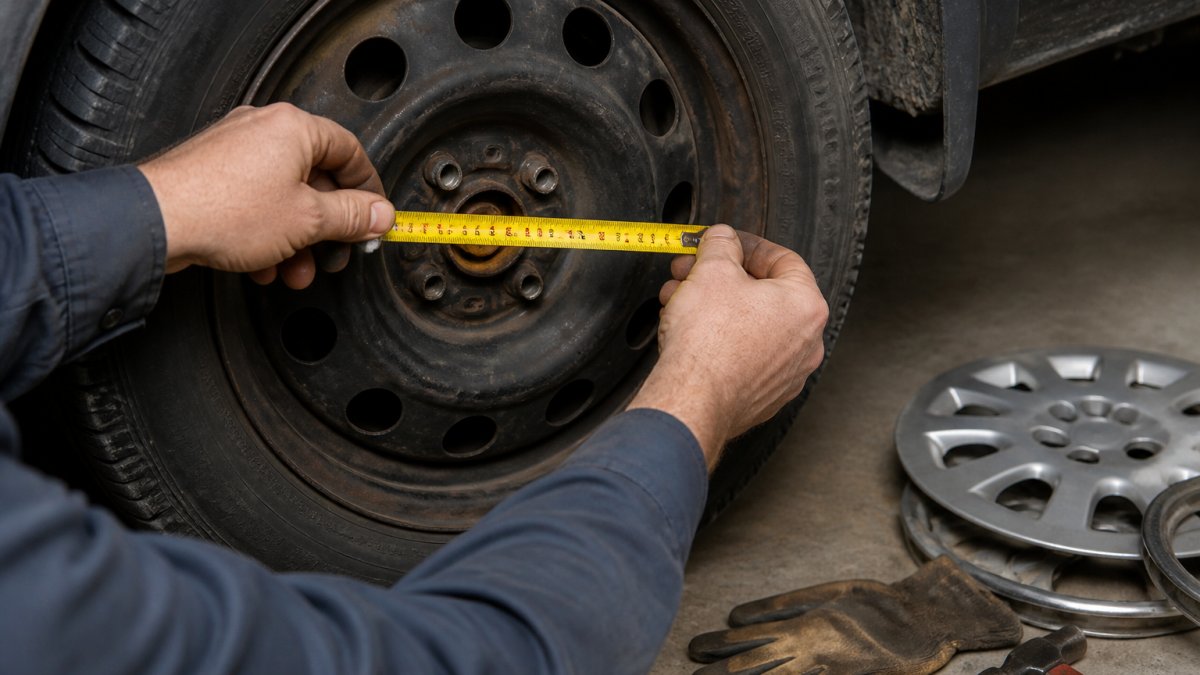
Do this with the wheel off the vehicle if you can, or at least clean the hub face so the holes are easy to see. Work on a flat surface and write each number down as you go.
Step 1: Count the Lugs
Count the wheel studs or lug holes in a single circle. Ignore any holes that sit closer to the center, since those are for alignment pins or brake hardware, not the pattern.
- Four lugs: common on compact cars and small trailers
- Five lugs: the most common car and crossover pattern
- Six lugs: mid-size trucks and SUVs
- Eight lugs: heavy-duty trucks
Write the number down. It becomes the first half of your pattern figure.
Step 2: Measure the Bolt Circle
Now find the bolt-circle diameter. For an even number of lugs, measure straight across from the center of one hole to the center of the hole directly opposite it. For an odd number, you measure differently, and the next section covers that.
Read the result in inches or millimeters, whichever your vehicle uses. Most passenger cars list the pattern in inches, while many imports and newer vehicles use millimeters.
How to Measure a 5-Lug Bolt Pattern (and Other Lug Counts)
The five-lug pattern is the one people get wrong most often, because no two holes sit directly across from each other. The fix is to stop measuring hole to hole and start measuring hole center to hole center along the bolt circle. Here is the method for every lug count, with the arithmetic that turns a raw reading into a pattern figure.
Find the hole centers first
Every measurement below runs center to center. On a clean hub, the center of each lug hole is easy to eyeball. On a wheel with rounded, beveled, or countersunk holes, the visual center shifts, so mark it: lay a straightedge across the hole in two directions and dot the intersection with a marker, or slip a transfer punch into the hole and mark the hub face. Measuring edge to edge adds roughly half a hole's width to your reading, which is the single most common source of a pattern that is close but wrong.
Four-lug: measure straight across
Measure from the center of one hole to the center of the hole directly opposite. That distance is the bolt-circle diameter. A reading near 3.94 inches (100 mm) is 4x100; near 4.5 inches (114.3 mm) is 4x4.5. No math needed.
Five-lug: skip one hole
Pick a hole, then measure to the center of the hole two positions away, skipping the one next to it. That skip-one distance equals the bolt-circle diameter. On a 5x4.5 wheel the skip-one reading is about 4.5 inches (114.3 mm); on a 5x4.75 wheel it is about 4.75 inches (120.7 mm). Do not measure to the adjacent hole, and do not average the two adjacent distances, because that produces a number that matches no standard pattern.
If you only have a tape and the skip-one span is awkward to hold, measure the distance between two adjacent hole centers and multiply by 1.7013. That factor is the ratio of the bolt-circle diameter to the adjacent-hole chord on a five-lug circle, so a 2.65-inch adjacent reading lands at roughly 4.5 inches. Treat the result as a check, not a substitute for the direct skip-one measurement.
Six-lug: measure straight across
Opposite holes line up, so measure center to center across the circle. A reading near 5.5 inches (139.7 mm) is 6x5.5. The wider spacing makes the tape easy to read, but keep the tape level or the diagonal throws the number off.
Eight-lug: measure straight across, keep it level
Same as six-lug: center to center across opposite holes. A reading near 6.5 inches (165.1 mm) is 8x6.5. Use a straightedge across the hub to keep the tape from sagging, since the longer span amplifies any tilt.
Any odd count: the skip-one rule
For five, seven, or any odd number of lugs, measure from one hole center to the center of the hole two positions over. That span is the bolt-circle diameter. The reason it works: on an odd-lug circle, the hole two positions away sits almost exactly opposite the starting hole across the circle's center, so the chord you measure is very close to the diameter. The adjacent-hole distance is always shorter and will never match a standard pattern.
Wheel Bolt Pattern Examples and Conversion Reference
A table is a check, not a measurement. The useful skill is turning a raw tape reading into a pattern figure and knowing how much drift is acceptable before you call it a mismatch. Here is how the arithmetic works, with worked examples and a tolerance rule.
Convert inches to millimeters
Multiply the inch reading by 25.4. A 4.5-inch reading is 4.5 x 25.4 = 114.3 mm, so 5x4.5 and 5x114.3 are the same pattern written two ways. A 5.5-inch reading is 139.7 mm, so 6x5.5 and 6x139.7 match. Round to the nearest tenth of a millimeter when you write it down; the pattern is listed to one decimal place, not to the thousandth.
Convert millimeters to inches
Divide by 25.4. A 120.7 mm reading is 120.7 / 25.4 = 4.75 inches, so 5x120.7 is 5x4.75. A 165.1 mm reading is 6.5 inches, so 8x165.1 is 8x6.5. If the division lands within about 0.02 inch of a listed pattern, you are almost certainly reading that pattern and the difference is tape error.
Worked examples
- Tape reads 4.49 inches across opposite holes on a four-lug wheel: 4.49 x 25.4 = 114.0 mm, within tolerance of 4x114.3. Call it 4x4.5.
- Tape reads 4.52 inches on a five-lug wheel using the skip-one method: 4.52 x 25.4 = 114.8 mm, within tolerance of 5x114.3. Call it 5x4.5.
- Tape reads 5.48 inches across opposite holes on a six-lug wheel: 5.48 x 25.4 = 139.2 mm, within tolerance of 6x139.7. Call it 6x5.5.
- Tape reads 4.72 inches on a five-lug wheel: 4.72 x 25.4 = 119.9 mm, within tolerance of 5x120.7. Call it 5x4.75.
Tolerance rule
A tape reading on a used hub typically drifts by up to about 0.02 inch (0.5 mm) from the true bolt circle because of hole wear, paint, and hand position. If your reading is within that band of a listed pattern, treat it as a match and confirm against the vehicle or wheel spec. If it sits between two patterns, re-measure center to center before you decide, because a reading that lands halfway usually means an edge-to-edge measurement crept in.
Common patterns reference
| Lug Count | Common Pattern (inches) | Metric Equivalent | Typical Vehicles |
|---|---|---|---|
| 4 | 4x4.0 | 4x100 | Compact cars, small trailers |
| 4 | 4x4.5 | 4x114.3 | Older sedans, some imports |
| 5 | 5x4.5 | 5x114.3 | Midsize cars, crossovers |
| 5 | 5x4.75 | 5x120.7 | Rear-drive cars, some SUVs |
| 6 | 6x5.5 | 6x139.7 | Mid-size trucks, SUVs |
| 8 | 8x6.5 | 8x165.1 | Heavy-duty trucks |
Use the table to sanity-check a reading, not to replace it. Two patterns can look close on a tape and still differ by a millimeter or two, which is why the tolerance rule matters more than the table.
How to Measure Wheel Size for Hubcaps
Bolt pattern and wheel size are different measurements, and hubcap buyers need both. Wheel size for a hubcap means the diameter of the wheel's outer rim where the cover snaps on, usually stated in inches.
Measure across the widest point of the rim, from inner lip to inner lip, not across the tire. A 16-inch wheel needs a 16-inch cover. The tire size printed on the sidewall also lists the rim diameter, so you can confirm your reading against it.
This is where ordering gets tricky. A cover that fits the diameter but not the bolt pattern can still sit wrong, and a cover for the right pattern but the wrong rim size will not clip on at all. At WheelCovers.Com, we stock original and custom covers across a huge range of sizes, and our site lets you search by vehicle to narrow it down before you buy.
Beyond Bolt Pattern: Other Fitment Checks
Bolt pattern is the starting point, not the whole fitment story. Three more specs decide whether a wheel or cover actually works on your vehicle.
- Center bore. The hole in the middle of the wheel must match the hub's diameter. Too small and the wheel will not seat; too large and you need a centering ring.
- Wheel offset. This is the distance from the mounting face to the wheel's centerline. Wrong offset pushes the wheel out or pulls it in, which can cause rubbing.
- Backspacing. Related to offset, measured from the mounting face to the inner edge of the wheel. Critical on trucks and trailers where clearance is tight.
Check all three against your vehicle's spec before ordering. A pattern match alone does not guarantee a fit.
Troubleshooting Conflicting Measurements
When two readings disagree, the problem is almost always technique, not the wheel. Work through these checks before you order anything.
- Re-measure center to center. Edge-to-edge readings are the top cause of a mismatch.
- Confirm your lug count. Count twice. A five-lug wheel measured like a four-lug will give a number that matches nothing.
- Check your units. A reading in millimeters converted carelessly to inches can land a full size off.
- Look for a stamped code. Many wheels have the pattern cast or stamped on the back of the hub. It settles the argument fast.
- Rule out a bent wheel. A damaged wheel can throw off a tape reading across opposite holes.
If your numbers still conflict, measure a second wheel on the same vehicle. If both wheels agree, trust that reading.
Getting the measurement right is the difference between a cover that clicks into place and one that rattles loose on the highway. If you'd rather skip the tape measure entirely, WheelCovers.Com makes it easy: search by your vehicle's year, make, and model, and we'll match you to covers built for your exact fitment. With over a million hubcaps, wheel covers, wheel skins, and trim rings in stock and nearly 50 years of experience, we can help you confirm the right size before you order. Shop now and get the fit right the first time.
Frequently Asked Questions
How do you measure a 5-lug wheel bolt pattern?
For a 5-lug pattern, measure from the center of one lug hole to the center of the lug hole two positions away (skipping one hole). This gives you the bolt circle diameter. If you measure from the center of one hole to the center of an adjacent hole, you'll get a smaller number that is not the true bolt pattern. Always use the skip-one method for 5-lug wheels to get an accurate wheel bolt pattern.
What tools do you need to measure a wheel bolt pattern?
You need a measuring tape or ruler with millimeter and inch markings, a straightedge, and optionally a bolt pattern measuring tool or gauge for faster, more accurate results. A caliper can help for precise center-to-center measurements. For hubcaps, you'll also need a tape measure to check wheel diameter. Having the right bolt pattern measuring tool reduces errors, especially on 5-lug patterns where the skip-one method is required.
Is bolt pattern the same as lug pattern?
Yes, bolt pattern and lug pattern are the same thing. Both terms refer to the number of lug nuts and the diameter of the circle they form. For example, a 5x4.5 pattern means 5 lugs on a 4.5-inch bolt circle. You may also see it written as 5x114.3 in millimeters. Understanding this terminology helps when shopping for wheel covers or hubcaps, as fitment guides often use both terms interchangeably.
How can you tell whether a wheel bolt pattern is measured in millimeters or inches?
Bolt patterns are often listed in both millimeters and inches. If the number is small (like 100, 114.3, 120), it's in millimeters. If it's a decimal (like 4.5, 5.5), it's in inches. For example, 5x4.5 is the same as 5x114.3. When measuring, use a tape that shows both scales, and always double-check the unit before ordering wheel covers. Many vehicle manuals list the pattern in one unit, so conversion may be needed.