

Posted by Editorial Team on Oct 20, 2026
How to Manage Fleet Wheel Replacement Schedules
Table of Contents
- Why Fleet Wheel Replacement Schedules Matter
- Establish Wheel Replacement Intervals for Fleet Vehicles
- Create a Fleet Wheel Inspection Checklist
- Develop Your Fleet Maintenance Schedule Template
- Use Fleet Maintenance Tracking Software
- Align Schedules with Vehicle Type and Usage Patterns
- Plan Wheel Replacement and Manage Inventory
- Reduce Downtime During Wheel Replacement
- Frequently Asked Questions
Last Updated: October 20, 2026
Why Fleet Wheel Replacement Schedules Matter
Managing fleet wheel replacement schedules isn't glamorous work. But it's essential. Wheels fail without warning. A blown tire on a delivery truck costs you money, lost productivity, repair bills, and sometimes safety issues. At WheelCovers.Com, we've worked with fleet operators for nearly 50 years, and we've seen how proper planning prevents expensive breakdowns.
The real cost of poor wheel management goes beyond a single flat. When your fleet sits idle waiting for repairs, you lose revenue. Your customers wait. Your reputation takes a hit. A structured fleet wheel replacement schedules system keeps vehicles on the road.
The good news: you don't need complex software to get started. You need a clear plan based on real data about your vehicles.
Establish Wheel Replacement Intervals for Fleet Vehicles
Setting the right replacement intervals is the foundation of your entire schedule. Intervals depend on how hard your vehicles work and what the manufacturer recommends.
Mileage-Based Intervals
Mileage is the most common trigger for wheel replacement. Most fleet operators track how many miles each vehicle travels and plan replacements at specific milestones.
Here's how to set mileage intervals:
- Consult your vehicle's owner manual for OEM recommendations
- Note the mileage threshold where wheels typically show wear
- Add a safety buffer (replace 5,000 miles before failure risk increases)
- Document the interval for each vehicle type in your fleet
Many fleet managers find that wheels last 40,000 to 60,000 miles under normal conditions. Heavy-duty trucks may see shorter intervals. Light-duty vehicles may go longer. The key is matching the interval to your specific vehicles and how you use them.
Track mileage at each service visit. When a vehicle approaches the interval, schedule replacement before problems develop.
Time-Based and Usage-Based Intervals
Mileage alone doesn't tell the whole story. A vehicle that sits in storage for months still ages. Environmental factors matter too.
Consider these factors alongside mileage:
- Calendar time: Replace wheels annually or every 18 months, even if mileage is low
- Engine hours: For equipment that tracks engine time, use this metric instead of miles
- Operating conditions: Harsh terrain, extreme temperatures, or heavy loads shorten wheel life
- Storage duration: Wheels stored outdoors degrade faster than those kept indoors
A vehicle driven 30,000 miles in one year may need replacement sooner than one driven the same distance over three years. Why? Constant use can be gentler than stop-and-start cycles or long idle periods in sun and weather.
Combine time-based and mileage-based thinking. If a wheel reaches either threshold first, replace it.
Create a Fleet Wheel Inspection Checklist
Inspections are where a replacement schedule earns its keep. A calendar interval tells you when to look; the inspection tells you whether the wheel actually comes off. The gap in most fleet guides is that they list things to eyeball but never define what counts as a failure. Build the checklist around measurable criteria and a written escalation path, and every technician will reach the same decision on the same wheel.
Set Inspection Frequency by Duty Cycle
Tie inspection frequency to how hard the wheel works, not to a single fleet-wide rule:
- Pre-trip walkaround (every departure): tire pressure, tread condition, lug nut presence, visible cracks, and anything loose on the wheel cover or hubcap.
- Scheduled PM inspection: at every oil service interval, or at 10,000-mile / 250-engine-hour increments for severe duty, whichever comes first.
- Torque re-check: after any wheel removal and reinstallation, re-torque fasteners at the interval your service manual specifies (commonly 50 to 100 miles after the work), then at each PM.
- Annual or seasonal deep inspection: full wheel-off inspection with the assembly cleaned, measured, and documented.
Visual and Physical Inspection Steps
Start with what you can see and feel. A disciplined visual pass catches most failures before they reach the road.
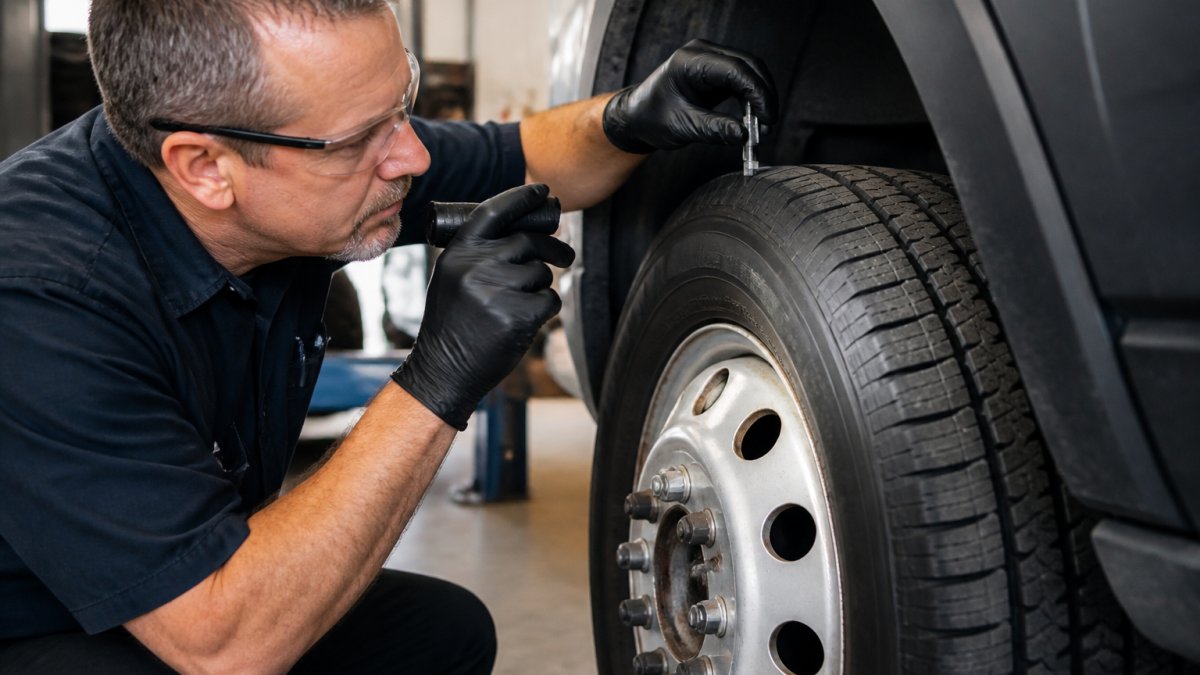
- Cracks and splits: inspect the rim flange, spoke-to-hub transitions, and around lug holes. Hairline cracks at lug holes are a common failure origin and are easy to miss under dirt.
- Bends and dents: check the inner and outer flanges for deformation that would cause vibration or bead-seat leaks.
- Corrosion and pitting: distinguish surface oxidation from deep pitting that reduces section thickness, especially on steel wheels in road-salt climates.
- Tire tread and sidewall: measure tread depth at multiple points across the tread width; uneven wear points to alignment, inflation, or a bent wheel.
- Fasteners: confirm every lug nut is present and verify torque with a calibrated wrench, not by feel.
- Wheel cover and hubcap retention: confirm the cover is seated, undamaged, and not masking a loose or damaged wheel underneath.
- Runout: with the vehicle raised and the wheel spinning freely, watch for lateral or radial wobble. A dial indicator gives a number; a trained eye gives a pass/fail.
Run your hand over the wheel surface after the visual pass. Rough spots, raised edges, and fresh gouges show up under a glove that the eye skips over.
Documentation and Pass/Fail Criteria
Every inspection needs a written standard. Ambiguity is how a failing wheel stays in service.
Create a form with these fields:
- Vehicle ID, current mileage, and engine hours
- Inspection date and inspector name
- Condition of each wheel, scored pass/fail per criterion
- Measured values where the criterion is numeric (tread depth, torque, runout)
- Notes on any damage observed
- Recommended action: return to service, monitor at next PM, or remove from service now
Define what "fail" means for each criterion:
| Inspection Criterion | Pass | Fail |
|---|---|---|
| Visible cracks | None anywhere on rim or spoke | Any crack, including at lug holes |
| Bent or dented rim | Cosmetic scuffing only | Any deformation affecting bead seat or runout |
| Tire tread depth | At or above the legal minimum and your fleet's own retirement threshold | Below either threshold, or uneven wear indicating a wheel or alignment fault |
| Lug nuts | All present, correct type, torqued to spec with a calibrated wrench | Any missing, loose, cross-threaded, or wrong-seat fastener |
| Corrosion | Surface oxidation only | Deep pitting, flaking, or material loss |
| Runout | Within the service manual's tolerance | Outside tolerance, or visible wobble on spin |
| Wheel cover / hubcap | Seated, undamaged, secure | Loose, cracked, missing, or masking wheel damage |
Escalation and Replacement Triggers
Not every finding means the same response. Write the escalation path into the checklist so technicians do not have to guess:
- Monitor: cosmetic scuffs, surface corrosion, and wear that is within tolerance. Re-check at the next PM and note the trend.
- Schedule replacement: a finding that is within tolerance today but trending toward failure, such as tread approaching the retirement threshold or runout creeping toward the limit. Put it on the next planned service window.
- Remove from service immediately: any crack, structural bend, missing or loose fastener that cannot be corrected on the spot, or runout outside tolerance. The vehicle does not leave the yard until the wheel is replaced.
Pair the escalation path with a parts decision. If the wheel comes off, the replacement should already be identified by part number and specification so the vehicle is not waiting on a procurement call. That link between inspection and inventory is what separates a schedule that works from a checklist that gets filed and forgotten.
Develop Your Fleet Maintenance Schedule Template
A template standardizes your process. Every vehicle follows the same logic. You spend less time planning and more time executing.
Your template should include:
- Vehicle identifier: Make, model, year, fleet number
- Current mileage: Updated at each service
- Next scheduled inspection date: Based on time intervals
- Next scheduled replacement mileage: Based on mileage intervals
- Last inspection results: Pass/fail status
- Service history: Date, mileage, work performed
- Parts used: Wheel type, brand, cost (if tracked)
Build this template in a spreadsheet or use dedicated fleet software. The format matters less than consistency. Every vehicle should have one master record that travels with it through its service life.
Update the template after every service visit. Mark inspection dates completed. Note any repairs or replacements. This history becomes invaluable when troubleshooting patterns.
Use Fleet Maintenance Tracking Software
Paper records work for small fleets. Larger operations need digital tools to stay organized.
Core Features to Look For
Good fleet maintenance software saves time and prevents oversights.
Look for these capabilities:
- Automated reminders: System alerts you when vehicles approach service intervals
- Mobile access: Technicians can log work from the shop floor
- Historical records: Complete service history for every vehicle
- Reporting: Generate maintenance reports to track costs and trends
- Integration: Connects with your existing systems (accounting, dispatch, etc.)
- User-friendly interface: Technicians adopt it without lengthy training
The best tool fits your workflow, not the other way around. Start with free or low-cost options if your fleet is small. Scale up as you grow.
Integration with Your Workflow
Software only works if your team actually uses it. Build adoption into your implementation plan.
Steps to integrate software successfully:
- Train all technicians on how to log work correctly
- Make it part of the routine: Log work immediately after service, not later
- Review reports weekly to catch patterns or missed intervals
- Adjust processes based on what the data shows
- Hold technicians accountable for complete, accurate records
Start with one vehicle or one team. Prove the system works. Then expand to your full fleet. This gradual approach reduces resistance and catches problems early.
Align Schedules with Vehicle Type and Usage Patterns
A single fleet-wide interval is the most common scheduling mistake. Two vehicles with the same odometer can have wildly different wheel lives depending on what they carry, where they drive, and what the weather does to them. Build the schedule around duty cycle, then let the inspection findings fine-tune it.
Start With Vehicle Class
Vehicle class sets the baseline interval. Treat these as starting points to be adjusted by the factors below, not as fixed rules:
- Light-duty (sedans, small pickups, cargo vans): standard OEM intervals usually hold. Inspect at every PM and at annual deep inspection.
- Medium-duty (delivery trucks, service bodies, box trucks): tighten inspection frequency and shorten the replacement interval relative to light-duty, because stop-and-go duty and frequent curb contact accelerate wheel and fastener wear.
- Heavy-duty (dump trucks, mixers, tractor-trailers): inspect at every PM and at shorter mileage or engine-hour increments; wheel and fastener loads are high and a failure is expensive.
- Specialized (refrigerated, tanker, and other vocational units): follow the manufacturer's specification precisely and add inspection points for the specific duty, such as repeated loading cycles or extreme temperature swings.
Adjust for Payload and Load Distribution
Wheel and fastener loads scale with what the vehicle carries and how that load sits on the axles. A truck that routinely runs near its gross vehicle weight rating puts more stress on wheels and lug hardware than one that runs light. A load concentrated over one axle or shifted to one side wears that corner faster. When you set intervals, note the typical payload and whether the load is balanced; a vehicle that runs heavy or unevenly loaded should be inspected more often and its replacement interval shortened accordingly.
Adjust for Terrain and Road Conditions
Where the vehicle drives changes the wear mechanism:
- Urban stop-and-go with frequent curb contact: scuffed and bent flanges, damaged covers, and loosened fasteners are the common findings. Increase visual inspection frequency.
- Highway and long-haul: steadier wear, but heat buildup and sustained load matter. Watch tread wear patterns and fastener torque.
- Unpaved, gravel, and construction sites: impact damage, stone chips, and vibration are the drivers. Shorten inspection intervals and watch runout closely.
- Winter road-salt exposure: corrosion accelerates on steel wheels. Add a post-season deep inspection and clean wheels thoroughly before storage.
Adjust for Climate and Storage
Temperature and storage conditions age wheels even when mileage is low:
- Extreme heat: tire and wheel assembly temperatures rise, and long idle periods in sun degrade rubber and finishes.
- Freeze-thaw cycles and road salt: corrosion and pitting progress faster; inspect more often in winter and clean aggressively in spring.
- Long-term storage: a vehicle that sits for months still ages. Calendar-based inspection and replacement thresholds apply even when the odometer barely moves.
Build the Schedule by Category, Not by Fleet
Combine the factors into a schedule per vehicle category rather than one rule for the whole fleet:
- Start with the OEM interval for the vehicle class.
- Shorten it for heavy payload, harsh terrain, severe climate, or high stop density.
- Lengthen it only when inspection history shows the wheels are consistently passing with margin.
- Review the schedule annually against actual inspection findings and adjust.
Document the category, the adjustments applied, and the resulting interval for each vehicle in the fleet record. That record is what lets you defend the schedule to a maintenance manager, a safety auditor, or an insurer, and it is what makes the next vehicle's schedule faster to set.
Plan Wheel Replacement and Manage Inventory
Knowing when wheels fail is half the battle. Actually having replacements ready is the other half.
Develop an inventory strategy:
- Stock common sizes for your most frequent vehicle types
- Keep 10-15% extra on hand for emergencies
- Track inventory levels so you never run out mid-season
- Rotate stock so old inventory gets used first
- Partner with suppliers for fast replenishment of specialty items
At WheelCovers.Com, we maintain over one million hubcaps and wheel covers in stock. When you need a replacement, we can ship it to you quickly. This takes pressure off your own inventory management.
Create a simple tracking sheet:
| Wheel Type | Size | Quantity on Hand | Minimum Stock | Reorder Point |
|---|---|---|---|---|
| Steel wheel cover | 16" | 12 | 5 | 8 |
| Aluminum hubcap | 17" | 8 | 3 | 5 |
| Trim ring | 15" | 6 | 2 | 4 |
When inventory hits the reorder point, place an order. This prevents the scramble when you need a part urgently.
Reduce Downtime During Wheel Replacement
Every hour a vehicle sits in the shop costs money. Efficient replacement processes keep downtime minimal.
Strategies to speed up wheel replacement:
- Prep parts before the technician arrives: Have the correct wheel ready, cleaned, and inspected
- Use the right tools: Proper equipment cuts replacement time in half
- Schedule multiple replacements together: Batch similar work to improve efficiency
- Have a backup plan: If one vehicle needs emergency replacement, have a loaner or alternate vehicle ready
- Train technicians for speed: Experienced technicians work faster without sacrificing quality
Most wheel replacements take 30-45 minutes per vehicle when everything is ready. Lack of preparation can stretch this to two hours.
Document your best practices. Time each replacement. Identify bottlenecks. Small improvements add up across your entire fleet.
Managing fleet wheel replacement schedules keeps your vehicles reliable and your operations running smoothly. The process is straightforward: set clear intervals, inspect regularly, track results, and replace proactively.
Start with a simple spreadsheet if you're new to this. Track mileage, inspection dates, and replacement history for each vehicle. As your fleet grows, upgrade to dedicated software. The investment pays for itself through prevented breakdowns and optimized maintenance timing.
WheelCovers.Com has helped fleet operators find the right wheel covers and replacements for nearly 50 years. Our inventory of over one million parts means you'll find what you need, when you need it. Shop our selection online, and get the parts your fleet depends on delivered straight to your door.
Frequently Asked Questions
How often should fleet wheels be inspected?
Fleet wheels should be inspected at regular intervals based on mileage and vehicle usage. Most fleets conduct inspections every 10,000 to 15,000 miles or monthly, whichever comes first. High-use vehicles in demanding conditions may require more frequent checks. Time-based inspections (weekly or monthly) catch seasonal wear and environmental damage that mileage alone won't capture. Your fleet maintenance schedule template should specify inspection frequency for each vehicle type.
What signs indicate a wheel needs replacement?
Replace a wheel when you observe visible cracks, bends, or permanent deformation; severe corrosion or rust that compromises structural integrity; lug nut holes that are damaged or stripped; or runout (wobbling) that cannot be balanced. Wheels with deep gouges, pitting, or missing sections also require replacement. Use your fleet wheel inspection checklist to document these conditions during routine inspections. Document findings in your fleet maintenance tracking software to establish replacement timelines.
Should wheel replacement schedules be based on mileage or condition?
The best approach combines both. Mileage-based intervals (typically 50,000 to 100,000 miles depending on vehicle type) provide predictable scheduling; condition-based assessment catches unexpected damage or accelerated wear from potholes, curbs, or overloading. Use wheel replacement intervals for fleet vehicles as your foundation, but inspect wheels regularly to identify issues before they become safety hazards. This hybrid method reduces emergency repairs and unplanned downtime while protecting your fleet assets.
How can fleet managers track wheel inspections and replacements?
Fleet maintenance tracking software is essential for consistent record-keeping. Log each inspection date, mileage, condition findings, and replacement dates. Assign inspections to specific technicians and set automated reminders based on your fleet maintenance schedule template. Track which wheels were replaced, when, and at what cost per vehicle. This data helps you identify patterns (vehicles with frequent damage, seasonal trends) and optimize your maintenance strategy. Centralized records also support compliance documentation if needed.