

Sep 29, 2026
How to Install Snap-On Wheel Covers: Step-by-Step
Table of Contents
- What You'll Need Before Installing Snap-On Wheel Covers
- How to Measure Wheel Size for Hubcaps
- Preparing Your Wheels for Installation
- Step-by-Step Installation of Snap-On Wheel Covers
- Testing for Secure Fitment
- Troubleshooting Loose Wheel Covers
- Common Installation Mistakes to Avoid
- Long-Term Maintenance and Care
- Frequently Asked Questions
Last Updated: September 23, 2026
What You'll Need Before Installing Snap-On Wheel Covers
Before you touch your wheels, gather the right tools. Most snap on wheel covers need very little to install, but having everything ready prevents frustration and damage.
You'll need a clean cloth or sponge for prep work. A bucket of warm soapy water helps remove dirt and grime. Some installations require a small amount of lubricant, silicon spray, soapy water, or WD-40 works well if clips feel tight.
A measuring tape ensures you grab the correct size. Many vehicle owners order the wrong diameter and face a poor fit. Check your vehicle's manual or look at the sidewall of your current wheel cover for the exact measurement in inches.
Wear gloves to protect your hands from sharp clip edges and dirty rims. A soft brush helps clean stubborn debris from the wheel well. Keep a small container nearby for lug nuts if you need to remove them temporarily.
Having everything ready means installation takes just minutes. Scrambling for tools halfway through creates unnecessary delays and increases the chance of damaging clips or the wheel itself.
How to Measure Wheel Size for Hubcaps
Getting the correct wheel size is the single most important step. An incorrectly sized wheel cover won't fit, and ordering the wrong size wastes time and money.
Start by checking your vehicle's manual or the driver's door jamb, where tire and wheel specifications are printed. Look for a measurement in inches, typically ranging from 14 to 20 inches for most vehicles. This number represents the wheel's diameter from edge to edge.
If you can't find documentation, measure your existing wheel cover. Place a measuring tape across the wheel from the outermost edge of one side to the outermost edge of the opposite side. Round to the nearest half inch. Most wheel covers come in standard sizes: 14", 15", 16", 17", 18", 19", or 20".
Some vehicles use multiple wheel sizes on different axles. Check all four wheels to confirm they match. If they don't, you'll need separate covers for front and rear.
Write down the exact measurement before ordering. Double-check it against product listings to ensure compatibility. WheelCovers.Com's inventory includes over 1 million hubcaps and wheel covers, and the right size matters for proper fitment and a professional appearance.
Preparing Your Wheels for Installation
Clean the wheel surface thoroughly
Dirt, brake dust, and road grime prevent proper seating of snap clips. A clean wheel ensures the cover sits flush and stays secure.
Start by rinsing the wheel with a hose or bucket of water. Use a soft-bristled brush to scrub away stubborn brake dust and debris. Pay special attention to the rim's outer edge where the snap clips will grip.
For heavily soiled wheels, use warm soapy water and a sponge. Dry the wheel completely with a clean cloth. Any moisture or soap residue can make clips slip during installation.
Don't use harsh chemicals or abrasive scrubbers, they can damage the wheel's finish. A gentle approach protects the underlying surface while removing the grime that interferes with fitment.
Verify compatibility with your rim
Not all wheel covers fit all rims. Steel wheels, alloy wheels, and specialty rims have different mounting characteristics. A snap-on wheel cover designed for steel wheels may not grip an alloy rim properly.
Check your vehicle's specifications to confirm your rim type. Steel wheels are flat and smooth, making them ideal for snap-on covers. Alloy wheels often have a more complex design with deeper insets, which can affect how clips engage.
Look at your existing wheel cover to see how it mounts. If clips grip the outer edge of the rim, your new cover should have the same design. If your current cover uses a different mounting system, verify that your new snap-on cover matches.
Step-by-Step Installation of Snap-On Wheel Covers
Align the valve stem hole
The valve stem hole is your starting point. This opening must align perfectly with the actual valve stem on your wheel, or the cover won't sit flat.
Position the wheel cover so the hole faces the valve stem. Hold it lightly against the wheel without applying pressure. Look through the hole to confirm it aligns with the stem. Adjust the cover's rotation until the hole and stem match up perfectly.
This single step prevents the most common installation problem: a cover that sits at an angle or rocks when the vehicle moves. Proper alignment also makes the remaining clips seat evenly.
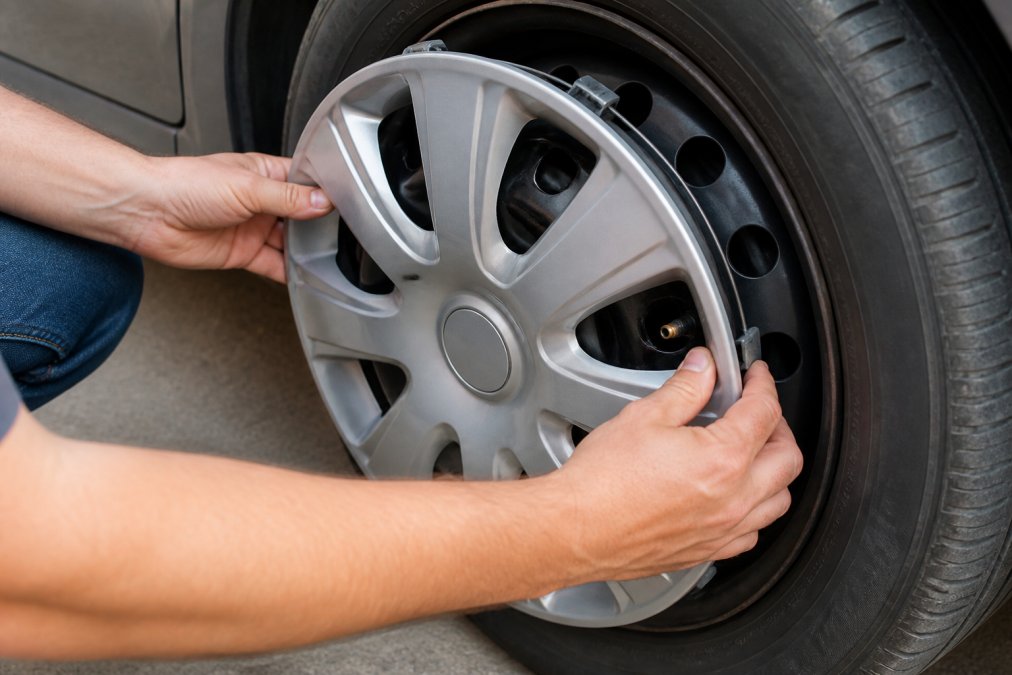
Position the retention ring and snap clips
The retention ring (also called the locking mechanism or bezel) holds the cover in place. Snap on wheel covers use clips that grip the wheel's outer edge and prevent the cover from rotating or coming loose.
Lower the wheel cover onto the wheel slowly. The snap clips should make contact with the rim first. You'll feel slight resistance as the clips begin to grip the rim's edge.
Position the retention ring so it sits evenly around the cover's inner edge. Some covers have a specific orientation, check your product instructions if included. The ring should be flush and level, not tilted or twisted.
Don't force the cover onto the wheel. If you feel significant resistance, stop and check alignment. A cover that doesn't slide on smoothly suggests misalignment or an incompatible rim.
Apply pressure to secure the cover
Once the cover is positioned correctly, apply steady, even pressure around the entire circumference. Push down firmly but not aggressively. The snap clips need pressure to fully engage with the rim, but excessive force can crack plastic tabs or damage the wheel.
Work your way around the cover, pressing down in multiple spots. You should feel the clips "click" or snap into place as they seat fully. This click is your confirmation that the locking mechanism is engaged.
Apply pressure to the center and outer edges. Many people focus pressure only on the center, leaving the outer edges loose. Distribute your force evenly to ensure all clips grip the rim equally.
The entire installation process typically takes just a few minutes once you have the hang of it. Speed comes with practice, your first installation may take longer as you develop a feel for the proper pressure and alignment.
Testing for Secure Fitment
After installation, confirm the cover is secure before driving. A loose wheel cover can fall off at highway speeds, creating a safety hazard and leaving you stranded.
Grab the outer edge of the cover and try to wiggle it side to side. There should be minimal movement. A properly installed cover won't rotate or shift when you apply moderate pressure.
Spin the wheel by hand if possible. The cover should rotate smoothly with the wheel without any wobbling or grinding sounds. Listen for clicks or rattles that suggest loose clips.
Drive slowly for the first 10 miles and listen carefully. A loose cover often makes a rhythmic thumping sound as it contacts the wheel well. Stop and inspect immediately if you hear anything unusual.
Check the fitment again after your first drive. Sometimes clips settle further into place after the initial pressure of motion. You may need to apply additional pressure to ensure maximum security.
Troubleshooting Loose Wheel Covers
A loose wheel cover is usually caused by insufficient pressure during installation or a rim that's incompatible with the cover design.
If the cover wobbles after installation, remove it completely and inspect the snap clips. Look for cracks or bent plastic tabs. Damaged clips won't grip properly and need replacement.
Clean the rim again thoroughly. Dirt or brake dust trapped between the clip and rim prevents full engagement.
Common Installation Mistakes to Avoid
Rushing the alignment step causes most installation failures. Take time to position the valve stem hole correctly before applying pressure. A misaligned cover won't seat properly no matter how much force you use.
Long-Term Maintenance and Care
Wheel covers need periodic attention to maintain their appearance and function. Regular cleaning prevents dirt buildup that can corrode the underlying wheel.
Frequently Asked Questions
How do I know if I have the right size wheel cover for my car?
Check your vehicle's manual or the sidewall of your tire for the rim diameter, typically ranging from 13 to 20 inches. Measure the diameter of your wheel from edge to edge, or visit WheelCovers.Com and enter your vehicle's year, make, and model to confirm the correct fit. Snap-on wheel covers are designed for specific rim sizes, so an incorrect diameter won't seat properly on the snap clips.
What should I do if my wheel cover won't snap into place?
Apply a thin layer of silicone lubricant or soapy water to the snap clips and the bezel edge of the wheel cover. This reduces friction and allows the clips to seat smoothly onto the rim. If the cover still resists, check that the valve stem hole aligns with your tire's valve stem and that you're applying even pressure around the entire circumference. Damaged or bent clips may require replacement.
Can I install snap-on wheel covers without removing the tire?
Yes. Snap-on wheel covers mount directly onto the rim without tire removal. Simply clean the wheel surface, position the cover with the valve stem hole aligned, and press firmly around the retention ring until all snap clips engage. The entire process typically takes just a few minutes per wheel.
How can I keep snap-on hubcaps from falling off while driving?
Ensure the retention ring is fully seated and all snap clips are engaged evenly around the rim. After installation, test the fitment by gently attempting to pull the cover away from the wheel, it should not move. If a cover becomes loose, reposition it by applying firm, even pressure across the entire bezel. Over time, check that clips haven't loosened due to road vibration and retighten if necessary.