

Oct 04, 2026
How to Clean Chrome Wheel Covers: A Step-by-Step Guide
Table of Contents
- Chrome-Clad vs. True Chrome: Why the Material Changes Everything
- What You'll Need: Supplies for Cleaning Chrome Wheel Covers
- Step-by-Step: How to Clean Chrome Wheel Covers
- How to Remove Brake Dust from Hubcaps
- Choosing the Best Chrome Wheel Cleaner
- Cleaning Plastic Chrome Wheel Skins Without Damage
- Polishing and Restoring Shine to Chrome Wheel Covers
- Protecting Your Chrome Wheel Covers: Sealants, Waxes, and Ceramic Coatings
- Troubleshooting: Rust, Oxidation, and Pitting on Chrome Wheel Covers
- Common Mistakes to Avoid When Cleaning Chrome Wheel Covers
- Frequently Asked Questions
Last Updated: October 4, 2026
Chrome-Clad vs. True Chrome: Why the Material Changes Everything
Chrome wheel covers come in two very different types, and knowing which one you own is the first step in how to clean chrome wheel covers without ruining them. True chrome is a metal finish. Plastic-chrome, often sold as wheel skins, is a thin chrome layer over an ABS plastic base. That difference decides which cleaners you can safely use.
Plastic-chrome reacts badly to strong chemicals. The chrome film can lift, cloud, or peel when it meets harsh acids or heavy solvents. True chrome is tougher, but it still scratches and pits over time.
At WheelCovers.Com, we've supplied hubcaps, wheel covers, and wheel skins for nearly 50 years. The number one reason customers replace covers is damage from the wrong cleaner, not normal wear.
So before you grab a bottle of anything, check your material:
- True chrome: Cool to the touch, heavy, magnetic in most cases.
- Plastic-chrome (wheel skins): Light, warm to the touch, flexes slightly under pressure.
Get this wrong and you can strip the finish in one wash. Get it right and your covers can look sharp for years.
What You'll Need: Supplies for Cleaning Chrome Wheel Covers
The right supplies for cleaning chrome wheel covers are simple and cheap. You do not need a cabinet full of specialty products. You need a few basics, plus the discipline to skip the harsh stuff.
Must-Have Cleaning Tools and Products
Gather these before you start:
- A pH-neutral car soap or non-acidic wheel cleaner
- Two buckets (one for soap, one for rinse water)
- A soft microfiber cloth and a microfiber wash mitt
- A soft foam sponge or detailing brush for tight spots
- A garden hose or a rinse bucket
- Compressed air or a clean drying towel
- A sealant, synthetic wax, or ceramic coating for after
A pH-neutral soap matters most. It lifts dirt without attacking the chrome or the clear coat around it.
What to Avoid: Abrasives and Harsh Chemicals
Skip anything abrasive. Steel wool, scouring pads, and gritty polishes scratch chrome and dull the surface finish fast. Acidic wheel cleaners, the kind sold for heavy brake dust on bare alloy, can stain plastic-chrome and eat into the chrome layer.
Also avoid household cleaners not made for cars. Kitchen degreasers and bathroom sprays often contain chemicals that react with the chrome film.
Step-by-Step: How to Clean Chrome Wheel Covers
Here is the full process, start to finish. Work one wheel at a time and keep the surface wet so dirt does not dry back onto the chrome.
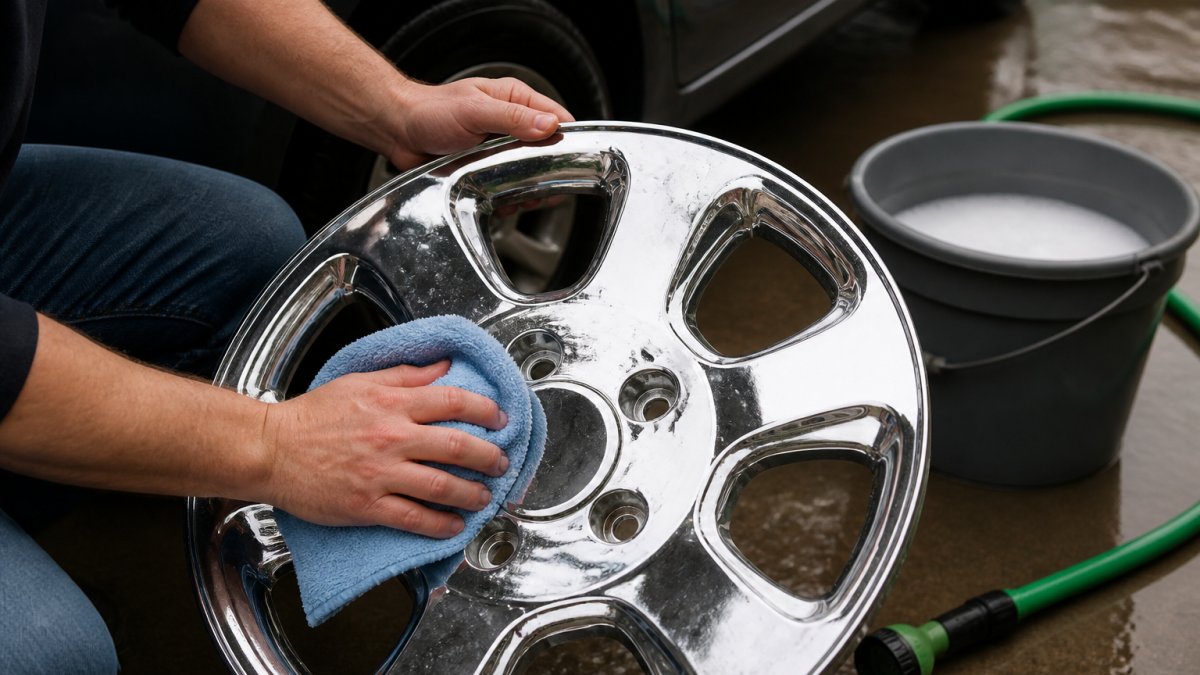
Step 1: Rinse and Loosen Dirt
Rinse the whole cover with water first. This removes loose grit before you touch the surface. If you skip this, you drag that grit across the chrome and scratch it.
Let the water soak for a minute. On stubborn spots, a second pass with the hose helps.
Step 2: Wash with pH-Neutral Soap and Microfiber
Mix your pH-neutral soap in one bucket. Dip the microfiber mitt and wipe from the top of the cover down. Use light pressure.
For brake dust and tight corners, switch to a soft foam sponge or detailing brush. Rinse the mitt often in your clean water bucket so you are not smearing dirt around.
Step 3: Rinse, Dry, and Inspect
Rinse thoroughly. Any soap left behind dries into streaks and water spots. Then dry the cover with a clean microfiber towel or compressed air.
Drying matters more than most people think. Water spots on chrome are mineral deposits, and they etch if left to sit. Once dry, run your hand over the surface and check for dull patches or rough spots.
How to Remove Brake Dust from Hubcaps
Brake dust is the main enemy of chrome wheel covers. It bonds to the surface and, left too long, it eats into the finish. The good news is that fresh brake dust comes off with soap and water. Old, baked-on dust needs a bit more patience.
A common mistake is attacking brake dust with a strong acid cleaner. That works on bare alloy wheels, but it can wreck plastic-chrome. Instead, use a non-acidic wheel cleaner made for chrome, or a pH-neutral soap with a soft brush.
For heavier buildup:
- Soak the cover with your non-acidic cleaner for a few minutes.
- Agitate with a soft detailing brush, not a stiff one.
- Rinse and repeat rather than scrubbing harder.
- Dry fully before moving on.
If the dust has been sitting for months, you may need two or three rounds. Slow and gentle beats fast and abrasive every time.
Choosing the Best Chrome Wheel Cleaner
The best chrome wheel cleaner for most people is a pH-neutral, non-acidic formula labeled safe for chrome and clear coat. That single rule covers true chrome and plastic-chrome wheel skins alike. But the reason it works comes down to pH, and understanding that number is what separates a safe wash from a stripped finish.
Why pH Is the Number That Matters
pH runs from 0 to 14. Seven is neutral. Anything below 7 is acidic; anything above 7 is alkaline. Chrome itself is fairly inert, but the layers under and around it are not.
- True chrome is a thin decorative layer plated over copper and nickel over steel or brass. It tolerates a wider pH band, but strong acids still attack the nickel layer through pinholes and scratches, which is what causes the brown bleed you see on older trim.
- Plastic-chrome (wheel skins) is a vacuum-metallized aluminum film sealed under a clear topcoat over ABS plastic. That topcoat is the weak point. Alkaline cleaners above roughly pH 10 and acidic cleaners below roughly pH 4 start to cloud, craze, or lift it. Once the topcoat fails, the shiny layer underneath oxidizes and turns gray.
Most practitioners find that a cleaner in the pH 6 to 8 range is safe for both materials. That is why a pH-neutral car soap is the default recommendation.
Cleaner Types Compared
| Cleaner Type | Typical pH | Safe for Plastic-Chrome? | Best For | Watch Out For |
|---|---|---|---|---|
| pH-neutral car soap | 6-8 | Yes | Weekly maintenance washes | Light dirt only; needs agitation |
| Non-acidic wheel cleaner | 7-9 | Yes | Brake dust buildup | Still read the label; some run alkaline |
| Acidic wheel cleaner | 1-3 | No | Bare alloy and uncoated metal only | Etches clear topcoat, stains chrome film |
| Alkaline degreaser | 11-13 | No | Engine bays, not wheels | Strips topcoat, dulls chrome |
| Household dish soap | 7-9 | Short-term only | Emergency use | Strips wax and sealant over time |
Read the label every time. "Safe for all wheels" is not the same as "safe for chrome." Look for the words non-acidic, pH-neutral, or pH-balanced. If a product lists hydrofluoric acid, ammonium bifluoride, or phosphoric acid, keep it away from plastic-chrome entirely.
Matching the Cleaner to the Job
For routine care, plain car soap does the job. Save the dedicated wheel cleaner for brake dust that soap will not touch. If you are dealing with heavy iron contamination, an iron-remover product that changes color as it dissolves ferrous particles is gentler on chrome than an acid wheel cleaner, and it works at a near-neutral pH.
Dilution and Contact Time
Even a safe cleaner can cause damage if you leave it on too long or mix it too strong. Follow the bottle's dilution ratio. Do not let any wheel cleaner dry on the surface. Work in shade or on a cool wheel, and rinse within the contact time the label specifies, usually one to three minutes. Longer dwell does not clean better on chrome; it just raises the odds of staining.
For routine care, plain car soap does the job. Save the dedicated wheel cleaner for brake dust that soap will not touch.
Cleaning Plastic Chrome Wheel Skins Without Damage
Plastic-chrome wheel skins need a gentler touch than true chrome. The chrome layer is a thin vacuum-metallized film sealed under a clear topcoat over ABS plastic, so heat, chemicals, and abrasion all do more damage here than they would on metal. Most guides stop at "use mild soap and a microfiber cloth." That is the starting point, not the whole job. The harder question is what to do when the finish is already going bad.
The Safe Routine
WheelCovers.Com recommends a simple routine for wheel skins: warm water mixed with mild dish soap or a non-acidic wheel cleaner. That approach protects the chrome finish and keeps the skin material intact, according to WheelCovers.Com's wheel skin care guidance.
What to do:
- Use warm water, never hot. Above roughly 140°F, ABS softens and the bonded film can lift at the edges.
- Add mild dish soap or a non-acidic cleaner in the pH 6 to 8 range.
- Wipe with a soft microfiber cloth, top to bottom, one section at a time.
- Rinse and dry right away. Do not let water sit in the seam between the skin and the tire.
- Never scrub with a brush that has stiff bristles. A soft detailing brush is the limit.
Where people go wrong is treating wheel skins like metal. They grab an abrasive cleaner, scrub hard, and lift the chrome film. Once that film lifts, the cover is done.
Troubleshooting Damage on Plastic-Chrome
This is where most guides go silent. Here is how to read the three common failure modes and what actually works.
Cloudy or hazy film (oxidation). The clear topcoat is breaking down, not the chrome underneath. A very light hand polish with a non-abrasive finishing polish on a foam applicator can sometimes clear mild haze. If the haze does not lift after one gentle pass, stop. More polishing removes more topcoat and makes it worse.
Peeling or lifting at the edges. The film is separating from the ABS. There is no product that re-bonds it invisibly. A small lifted edge can sometimes be pressed back with light heat from a hair dryer on low, but the fix is temporary and the edge will lift again. Plan on replacement.
Deep scratches or scuffs. If you can catch a fingernail in the scratch, it is through the topcoat and into the metallized layer. That cannot be polished out. Shallow scuffs that only mark the topcoat can sometimes be reduced with a plastic polish, but go slow and test on a hidden area first. If your cloth picks up silver color, you are cutting through the finish.
Rust-colored spots. On plastic-chrome, rust usually means the film has worn through to a steel clip or the wheel beneath, and the stain is bleeding up through the plastic. Cleaning will not fix it. Replacement is the honest answer.
When to Clean vs. When to Replace
A quick test: if the defect is on the surface, you can often clean or lightly polish it. If the defect is into the surface, you cannot. Cloudy topcoat and light scuffs are surface problems. Peeling, pitting, and scratches you can feel with a fingernail are into the surface. Spending an hour polishing a peeling skin is an hour wasted. A replacement skin costs less than the polish and applicator you would burn through trying to save it.
Polishing and Restoring Shine to Chrome Wheel Covers
Dull chrome usually means oxidation, not permanent damage. A light polish can bring the shine back if the chrome layer is still intact.
For true chrome, a chrome or metal polish applied with a soft cloth and light pressure restores gloss. Work in small circles, then buff off with a clean microfiber towel. A restoration test comparing polishing methods on rusted chrome found that metal polish worked well on surface rust when paired with the right applicator.
For plastic-chrome, be careful. Many polishes are too abrasive for the thin film. Test on a small hidden spot first. If the cloth picks up chrome color, stop. That means you are cutting through the finish.
A polishing compound is stronger than a polish. Use it only on true chrome with real oxidation, and go slow. Too much pressure burns through the chrome and exposes the base metal underneath.
Protecting Your Chrome Wheel Covers: Sealants, Waxes, and Ceramic Coatings
A protective layer after cleaning is what keeps chrome looking good for months instead of days. Industry discussion suggests applying wax, sealant, or ceramic coating to wheel covers after cleaning to create a barrier against brake dust and road grime, according to RamForum's wheel care discussion.
Your options:
- Synthetic wax: Easy to apply, good short-term protection, needs reapplication often.
- Sealant: Lasts longer than wax, still simple to use.
- Ceramic coating: The longest-lasting option, forms a hard protective layer, costs more and takes more care to apply.
For most drivers, a sealant hits the sweet spot. It is cheap, quick, and cuts how often you need to deep clean. Ceramic coating makes sense if you want to wash less often and do not mind the upfront cost.
Whatever you choose, apply it to a clean, dry cover. Putting wax or sealant over dirt traps the grime against the surface.
Troubleshooting: Rust, Oxidation, and Pitting on Chrome Wheel Covers
Rust, oxidation, and pitting are the three problems that end a chrome cover's life. Each one needs a different response, and knowing which you have saves you from wasting time on a fix that will not work.
Rust shows up as brown or orange spots. On true chrome, light surface rust often comes off with metal polish. On plastic-chrome, rust usually means the chrome film has worn through to a metal layer underneath, and that is a replacement case.
Oxidation looks like a cloudy, hazy film. It is the chrome reacting with air and moisture. A light polish usually clears it on true chrome.
Pitting is small dark dots or craters in the surface. It means the chrome layer is breaking down. Pitting cannot be polished out. It only gets worse.
A quick way to tell them apart: if the spot is on the surface, you can often fix it. If the spot is into the surface, you cannot.
Common Mistakes to Avoid When Cleaning Chrome Wheel Covers
The biggest mistakes when cleaning chrome wheel covers all come down to being too aggressive. Chrome rewards patience and punishes shortcuts.
Watch for these:
- Using acidic cleaners on plastic-chrome. The chrome film clouds and peels.
- Scrubbing with abrasive pads. Scratches dull the surface finish for good.
- Letting water dry on its own. Water spots etch into the chrome.
- Skipping protection. Bare chrome collects brake dust faster.
- Cleaning hot wheels. Heat plus cleaner speeds up chemical reactions that damage the finish.
- Ignoring small spots. Oxidation and pitting spread if you leave them.
A common mistake is cleaning wheels right after a drive when they are still hot. Let them cool first. Cool chrome is safe chrome.
For drying, practitioners recommend compressed air to blow water out of complex wheel designs, according to AACA Forums' detailing tips. That beats a towel for getting water out of tight spots where it would otherwise sit and spot.
If your covers are past saving, replacing them is easier than fighting a losing battle. WheelCovers.Com stocks over 1 million hubcaps, wheel covers, wheel skins, and trim rings, with nationwide shipping and a simple online ordering process. You can find the right fit for your vehicle without digging through salvage yards.
Frequently Asked Questions
Does WD-40 clean chrome wheels?
WD-40 can help remove rust and light grime from chrome wheels. However, it leaves an oily residue that attracts dust, so it's best used for spot-treating rust, followed by a pH-neutral soap wash. For regular cleaning of chrome wheel covers, stick to mild soap and water to avoid buildup.
What's the best thing to clean chrome wheels with?
The best cleaner for chrome wheels is warm water mixed with a mild dish soap or a non-acidic, pH-neutral wheel cleaner. Microfiber cloths or foam sponges work well for scrubbing without scratching. For plastic chrome wheel skins, avoid abrasive cleaners; instead, use a soft brush and gentle soap. Always rinse thoroughly and dry with compressed air or a microfiber towel to prevent water spots.
What should you not use to clean chrome wheel covers?
Avoid harsh chemicals, abrasive cleaners, steel wool, and acidic wheel cleaners on chrome wheel covers, especially plastic-chrome models. These can scratch the surface, strip the clear coat, and cause corrosion. Also, never use Windex or ammonia-based glass cleaners on chrome, as they can dull the finish over time. Stick to pH-neutral soaps and soft microfiber cloths.
How do you remove brake dust from chrome wheel skins?
To remove brake dust from chrome wheel skins, first rinse the wheel to loosen dirt. Apply a pH-neutral wheel cleaner or a mix of warm water and mild dish soap, then gently scrub with a microfiber cloth or soft brush. For stubborn brake dust, use a dedicated non-acidic wheel cleaner and let it dwell for a few minutes before agitating. Rinse thoroughly and dry to prevent water spots.
Keeping chrome wheel covers clean is a routine, not a one-time job. The catch is that the wrong product or a rough scrub does more harm than a little dirt ever would. WheelCovers.Com makes replacement simple when a cover is beyond saving, with a huge inventory of original and custom wheel covers, wheel skins, and trim rings, plus easy online ordering and nationwide shipping. Get started with WheelCovers.Com and find the perfect fit for your vehicle.