

Sep 29, 2026
Affordable Wheel Skins for Steel Wheels: A 2026 Guide
Table of Contents
- What Are Wheel Skins and Why They Matter for Steel Wheels
- How to Install Wheel Skins: Step-by-Step Instructions
- Chrome Wheel Skins for Steel Wheels: Finishes and Styles
- Compatibility, Fitment, and Rim Size Considerations
- Wheel Skin Maintenance Tips and Long-Term Durability
- Cost Savings and Performance Impact
- Frequently Asked Questions
Last Updated: September 25, 2026
What Are Wheel Skins and Why They Matter for Steel Wheels
Affordable wheel skins are snap-on plastic covers designed to transform the appearance of standard steel wheels. They fit directly over your existing rim, mimicking the look of premium alloy wheels without the cost of replacement. If you're driving a vehicle with factory steel wheels, wheel skins offer a practical way to upgrade your vehicle's appearance in hours rather than days.
The appeal is straightforward: steel wheels are functional but plain. They lack the visual impact of alloy rims. For decades, owners faced a choice, spend $800 or more on new rims or accept the utilitarian look. Wheel skins changed that equation. According to Smart Wheel Skins cost comparison data, you can achieve a complete aesthetic transformation for $15 to $40 per unit, with savings exceeding $1,000 compared to full wheel replacement.
WheelCovers.Com maintains an inventory of over 1 million wheel covers and wheel skins, positioning the brand as a comprehensive resource for vehicle owners seeking affordable rim covers. The family-owned business has nearly 50 years of industry experience, making it a reliable resource when sourcing wheel skins for steel wheels.
What makes wheel skins different from traditional hubcaps? Hubcaps sit at the center of the wheel. Wheel skins wrap around the entire rim face, covering the visible portion of the steel wheel itself. This distinction matters because it determines fitment, installation difficulty, and visual impact. A quality wheel skin creates the illusion of a complete alloy wheel upgrade, the trim level appearance without the trim level price tag.
How to Install Wheel Skins: Step-by-Step Instructions
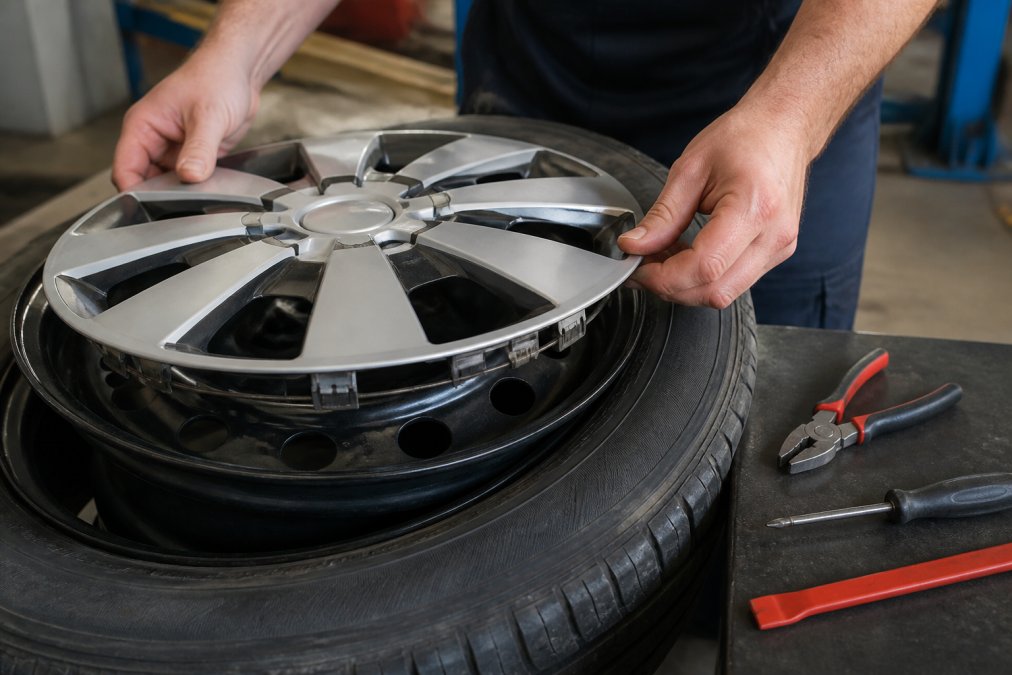
Installing wheel skins is a DIY-friendly task. The process involves no permanent modifications to your vehicle, which means removal is equally straightforward if you change your mind later.
What You'll Need Before Starting
Gather these items before you begin:
- A set of wheel skins matching your rim diameter
- A rubber mallet or soft-faced hammer
- Tire pressure monitoring system (TPMS) sensor covers if your vehicle uses valve-stem TPMS
- Clean cloth or microfiber towel
- Wheel cleaner or mild soap and water
- Masking tape (optional, for alignment guides)
Most wheel skins use snap-in clips that require no adhesive or fasteners. This design choice matters because it means installation is reversible and doesn't damage your original steel rim.
Installation Process
Step 1: Clean Your Wheels Wash each wheel thoroughly with wheel cleaner and dry completely. Dirt or debris trapped between the skin and rim will create visible bumps and prevent proper seating. This step directly impacts the final appearance.
Step 2: Inspect the Rim for Damage Look for dents, rust, or pitting on the steel rim surface. Small surface rust is fine, the wheel skin will cover it. Deep dents or sharp protrusions can prevent proper fitment. If you find significant damage, address it before proceeding.
Step 3: Position the Wheel Skin Start at the top of the rim and align the wheel skin's center with the rim's center. The snap-in clips on the inside edge of the skin should face inward, ready to engage with the rim lip. Work slowly, rushing this step causes misalignment.
Step 4: Snap the Skin Into Place Beginning at the top, press the wheel skin down firmly. Move clockwise around the rim, applying steady pressure. You'll feel the clips engaging as they lock onto the rim edge. Use your rubber mallet if needed to seat stubborn sections, but avoid excessive force that could crack the plastic.
Step 5: Verify Lug Nut Clearance Once the skin is fully seated, reinstall your wheel on the vehicle and hand-tighten the lug nuts. Verify that the wheel skin doesn't interfere with lug nut installation. If clearance is tight, some wheels require minor trimming of the skin around the lug nut holes, check your product documentation for guidance.
Step 6: Final Inspection Step back and check for even seating around the entire rim. The skin should sit flush with no gaps or raised edges. If you notice uneven areas, remove the skin, clean the rim again, and reinstall.
Common Installation Mistakes to Avoid
The most frequent error is installing wheel skins on a dirty rim. Dust and debris create air pockets that prevent proper seating and cause visible bulges. Take the extra 10 minutes to clean thoroughly.
Second, rushing the snap-in process. The clips must engage fully around the entire rim. Partial engagement will cause the skin to pop off during driving or create an unstable appearance. Work methodically, section by section.
Third, ignoring TPMS sensors. If your vehicle uses valve-stem sensors, you need sensor covers designed for your specific wheel skin style. Installing a skin without proper sensor accommodation can interfere with tire pressure readings.
Chrome Wheel Skins for Steel Wheels: Finishes and Styles
Wheel skins come in three primary finishes, each creating a distinct aesthetic. Your choice depends on your vehicle's overall styling and personal preference.
Chrome finish offers a high-gloss, reflective appearance that mimics polished alloy wheels. This style works well for trucks and SUVs where the chrome complements other trim. Chrome skins are durable but require regular cleaning to maintain their shine, fingerprints and water spots show easily.
Gloss black creates a modern, aggressive look popular on contemporary vehicles. Black wheel skins pair well with darker vehicle colors and give a purposeful appearance. They hide dirt better than chrome but can appear flat in low light without proper cleaning.
Matte finishes have grown in popularity, offering a subdued, premium appearance. Matte wheel skins avoid the reflective quality of chrome while maintaining sophistication. They're less prone to showing water spots than glossy options.
Beyond finish, wheel skins come in factory-inspired designs that mimic specific trim levels. According to Coast 2 Coast International 2026 product catalog, the "Impostor" style, precision-molded overlays designed to replicate higher trim level alloy wheels, represents the fastest-growing category. These skins use detailed spoke patterns and center cap designs to create visual authenticity that casual observers can't distinguish from genuine alloy wheels.
Compatibility, Fitment, and Rim Size Considerations
Wheel skin compatibility hinges on two critical factors: rim diameter and vehicle make and model. Installing an incompatible skin creates gaps, poor seating, or interference with suspension components.
Measuring Your Rim Size Accurately
Your rim diameter is printed on your sidewall. Look at your tire's sidewall markings, you'll see a sequence like "P225/65R16". The final number (16 in this example) is your rim diameter in inches. Standard steel rim sizes include 14", 15", 16", and 17", according to OMAC Shop sizing standards.
Don't rely on your vehicle's year alone. A 2015 Honda Civic might come with 15" or 16" rims depending on trim level. Measure before ordering.
Verifying Vehicle Make and Model Compatibility
Beyond diameter, the rim's offset, bolt pattern, and center bore diameter affect fitment. WheelCovers.Com's inventory of over 1 million products includes fitment data for specific vehicle years and trim levels. When you locate a wheel skin, verify it lists your exact make, model, and year. A skin designed for a 2015 Civic may not fit a 2016 model due to subtle rim design changes.
Center cap compatibility matters too. If your wheel skin includes a center cap, confirm it matches your vehicle's lug nut pattern and bolt circle diameter.
Wheel Skin Maintenance Tips and Long-Term Durability
Wheel skins are manufactured from durable ABS plastic, a material chosen for impact resistance and longevity. However, they're not indestructible. Proper maintenance extends their lifespan significantly.
Cost Savings and Performance Impact
The financial case for wheel skins is compelling. A quality set of wheel skins is significantly more affordable than new alloy rims. For budget-conscious owners, the value proposition is compelling.
DIY Removal and Replacement When Needed
Removing a wheel skin is simpler than installation. Work around the rim with a plastic pry tool (a credit card works in a pinch), gently lifting the snap-in clips away from the rim edge. Once one section releases, the remaining clips disengage easily.
Impact on Wheel Balance and TPMS Compatibility
Wheel balance is unaffected by wheel skins if they're installed correctly and evenly. The skin's weight is distributed uniformly around the rim, so dynamic balance remains unchanged. Your vehicle won't experience vibration or pulling related to the skin itself.
| Aspect | Details | Impact |
|---|---|---|
| Cost per wheel skin | $15-$40 per unit | $100-$160 for full set |
| Installation time | 30-60 minutes | DIY-friendly, no professional help needed |
| Rim sizes supported | 14", 15", 16", 17" | Covers most steel wheel vehicles |
| Savings vs. new wheels | $1,000+ per vehicle | Makes aesthetic upgrade accessible |
| Durability | ABS plastic, impact resistant | 5+ years with proper maintenance |
| Removal | Reversible, 10-15 minutes | No permanent changes to rim |
Frequently Asked Questions
How much do affordable wheel skins for steel wheels typically cost?
Quality wheel skins are significantly more affordable than replacement rims. Pricing depends on material quality, finish type (chrome, gloss black, or matte), and your specific vehicle model. Visit WheelCovers.Com for current pricing and availability for your vehicle.
Do wheel skins fit all steel wheels, or do I need to check compatibility first?
Wheel skins must match your rim's diameter and lug nut pattern. Standard sizes include 14", 15", 16", and 17" steel rims. Before ordering, verify your vehicle's make, model, and year, fitment accuracy is critical for proper snap-on installation. WheelCovers.Com's inventory of over 1 million wheel covers allows you to confirm exact compatibility for your specific vehicle before purchase.
What's the difference between wheel skins and traditional hubcaps?
Wheel skins are precision-molded overlays that cover most of the wheel face and snap onto the rim using clips, offering a factory-inspired look and greater coverage than hubcaps. Hubcaps typically cover only the center portion of the wheel. Wheel skins provide cosmetic enhancement, making them ideal for upgrading steel wheels to resemble higher trim level alloy wheels.
How do I maintain wheel skins to ensure they last long-term?
Clean wheel skins regularly with mild soap and water to prevent dirt and salt buildup, especially in winter months. Inspect snap-in clips regularly to ensure they remain secure. Durable ABS plastic resists impact and fading, but avoid abrasive cleaners or high-pressure washing that could damage the finish. Proper maintenance extends finish longevity.